Monday, December 25, 2023

Merry Christmas - Be Joyful!!

 Matthew 2:10-11. When they [the wise men] saw the star, they rejoiced exceedingly with great joy. And going into the house, they saw the Child with Mary His mother, and they fell down and worshiped Him.

Merry Christmas sweet friends! I hope your day is filled with the joy and hope of Christ! 


Today I have an art journal page for you. I created a sunrise scene with water and mountains using Be Joyful by Prickley Pear Stamps for my main image and Birdcage Winter 2 (the little row of trees) to create a tree line. I colored the girl with Copics and the rest was created with Distress Oxides.

I have done a similar scene before I tried new things today...I haven't done water before you I just jumped in and it worked out I think. I also tried shadows and dark coloring assuming this girl's face was to the SON(sun) and we would see her back on darker colors. I also haven't done that much either so it was fun to try it out!

Thanks for stopping by! Have a wonderful, blessed day!!

Hugs,
Lyn

Thursday, December 21, 2023

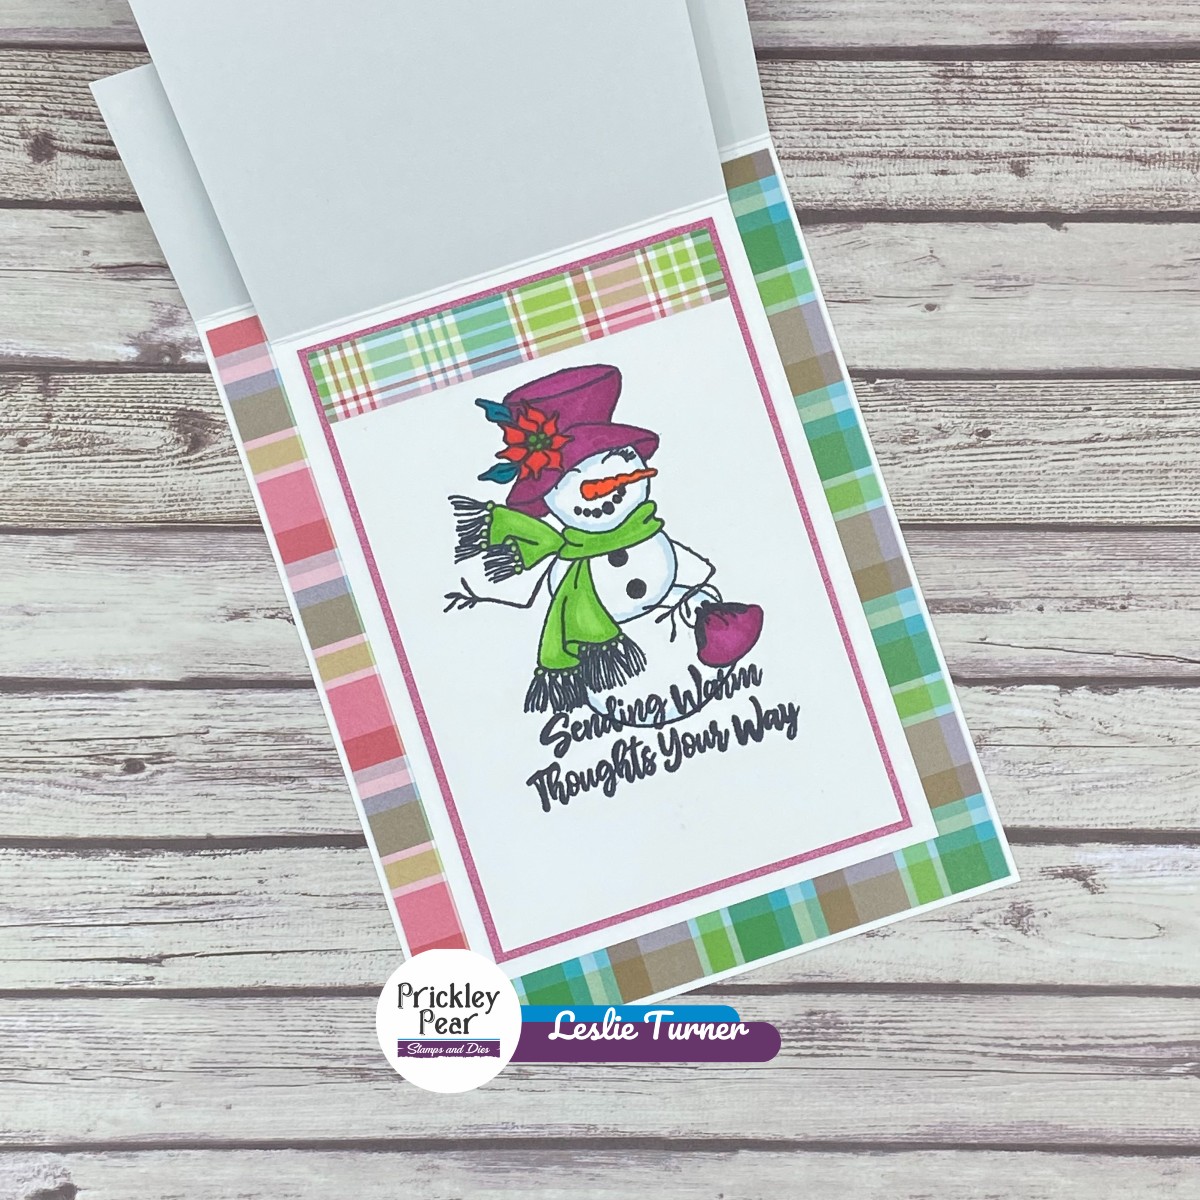
Sending Warm Thoughts Your Way

Hey everybody! Well, only a few more days before Santa arrives... I hope you're ready! I'm just shaking my head at how fast this year has flown by! Leslie here, sharing an inspiration project created with the Snow Ladies Trio stamp set along with the Nesting Tag Dies. I totally love this stamp set and have used all three images and three sentiments in the set to create a double flap fun fold, and I love how it turned out! I always love using non-traditional colors on Christmas cards!


The card bases, inside layering panel and one tag were cut from white cardstock. Another tag was cut from metallic pink cardstock and the layering panels were cut from coordinating prints in a cute plaid paper pad in my stash. I fashioned a bow from some pink gingham ribbon in my stash to embellish the pink tag. I have to say I'm really enjoying these Nesting Tag Dies because each one has a different stitched edge and they are so fun!


All three ladies from the Snow Ladies Trio stamp set were stamped in black ink and colored with alcohol markers, and each one sports a different sentiment. I totally love that different images and sentiments can be used on the multiple layers of this fun fold, providing little surprises for the recipient as each layer is lifted! 


Prickley Pear Stamps products used:
Snow Ladies Trio stamp set
Nesting Tag Dies

Thanks so much for stopping by today - we'll see you again soon!

Scrappy hugs,
Leslie
Blog / Facebook / Instagram / Pinterest / Twitter

Monday, December 18, 2023

Box it up!!

Happy Monday All!!

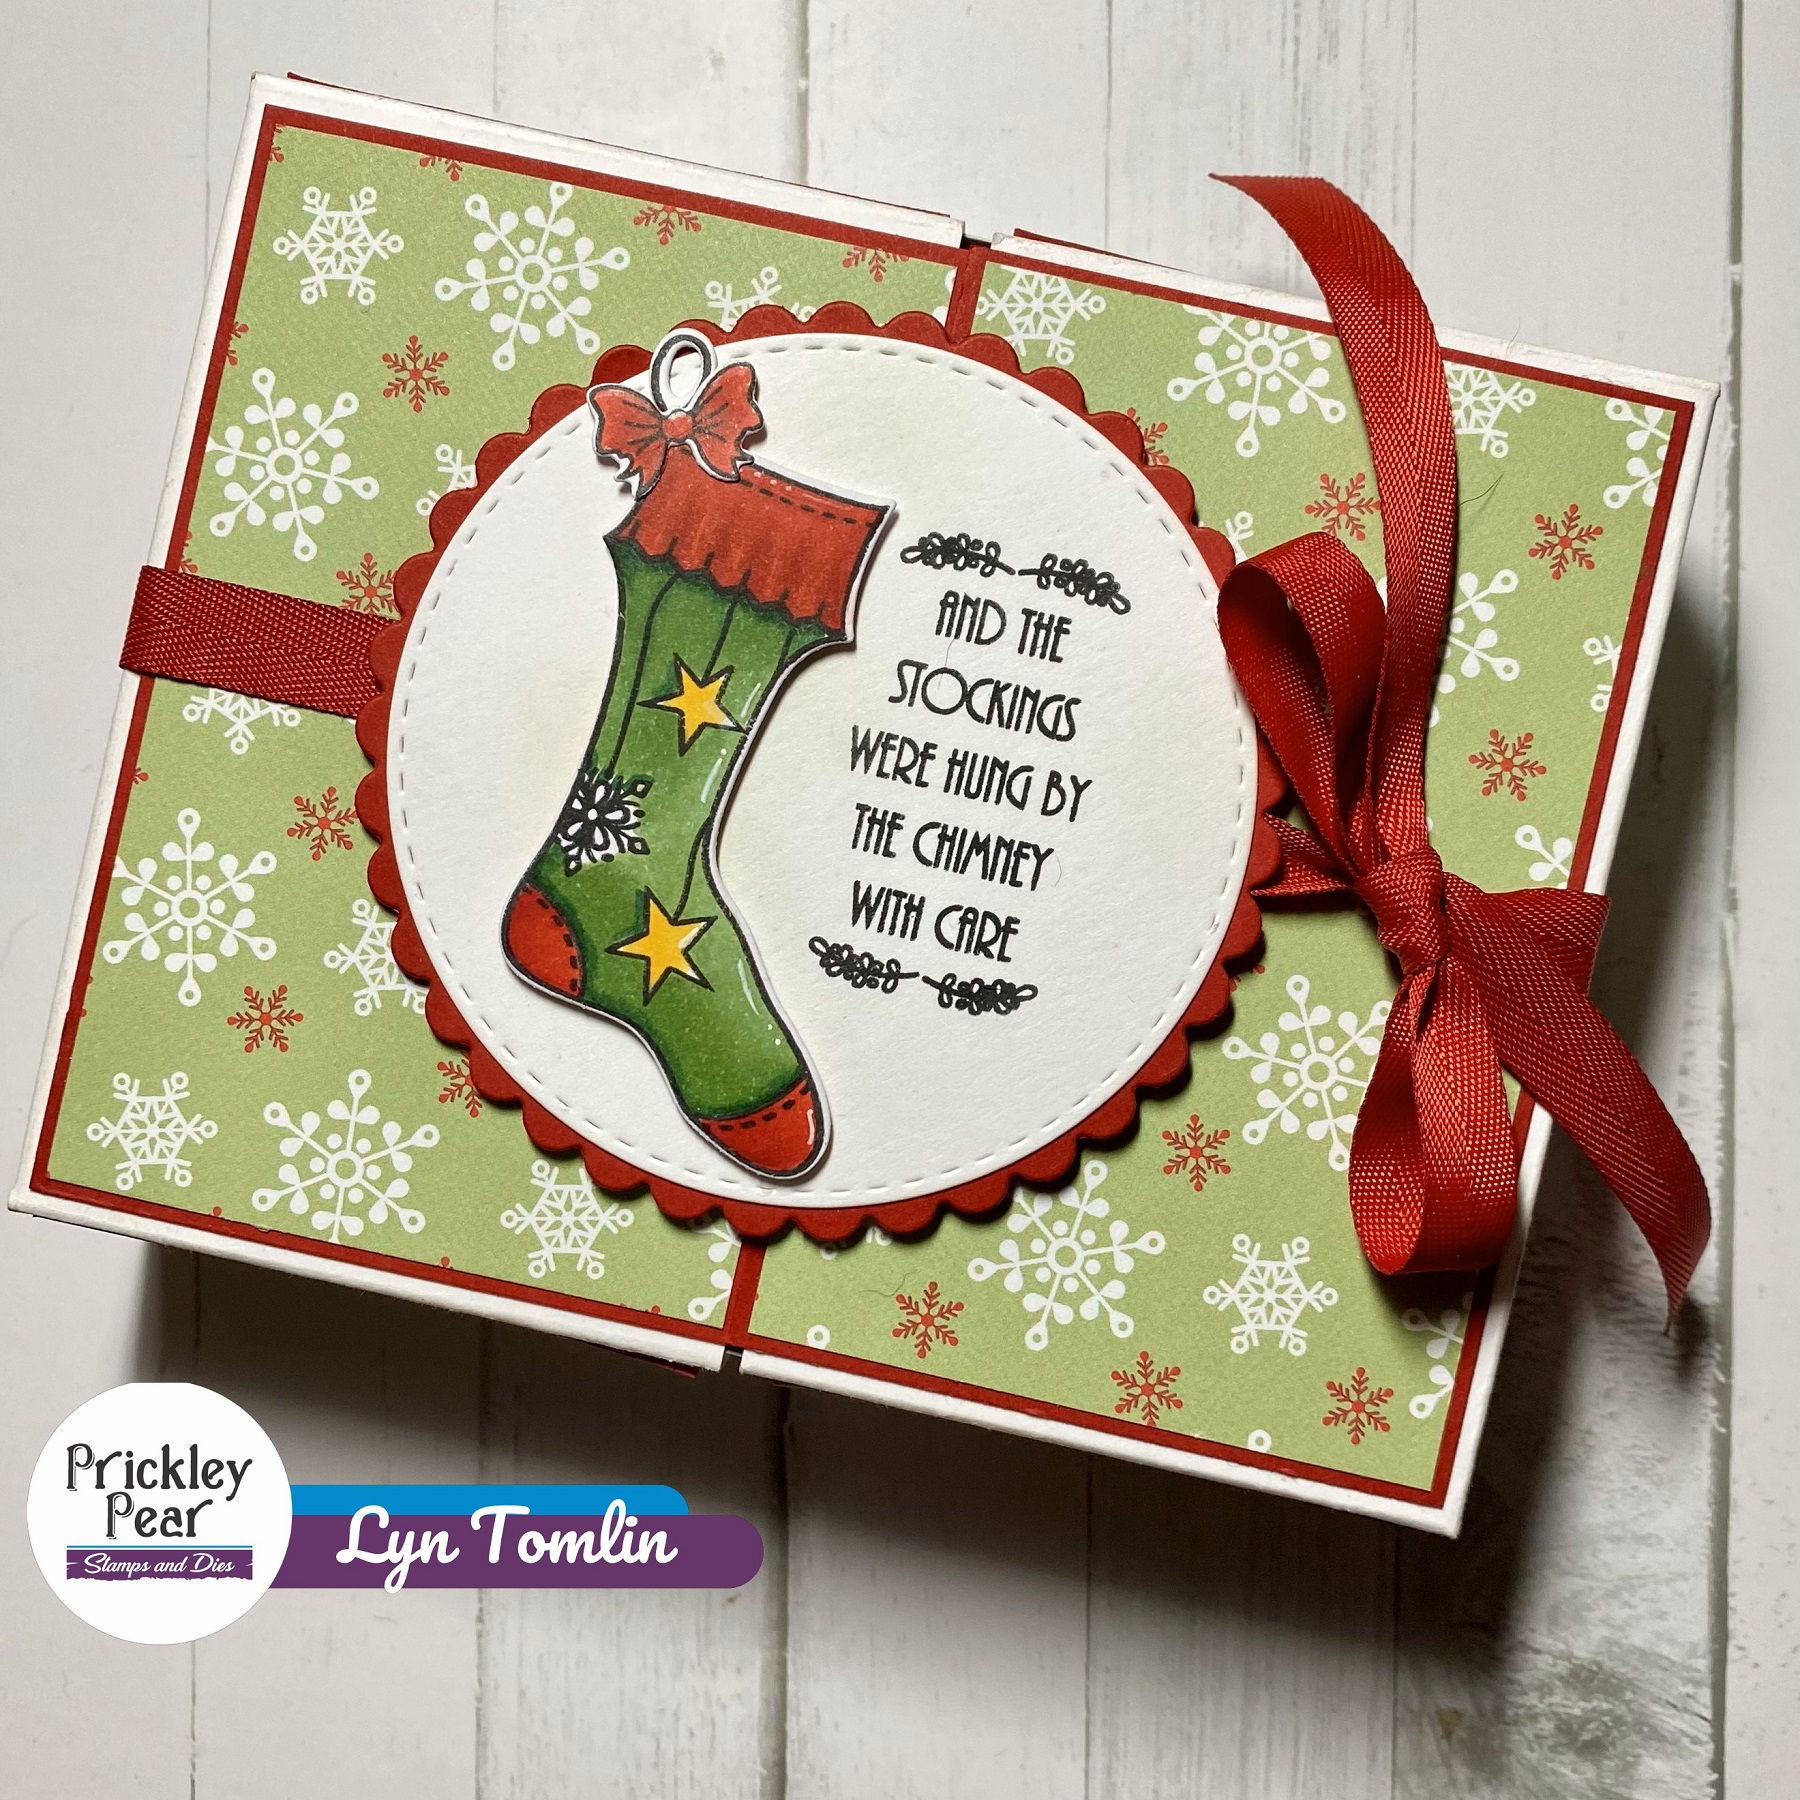
As I often do this time of year, I am finding myself needing some fun wrapping for a couple of gift cards. I decided to look for inspiration in the Splitcoast Stampers Tutorial section. It has been a while since I looked through the tutorials and there is so much there! Well...I found a tutorial for a fold-out Split Top Box that looked so adorable that I decided I really needed to try it. It has several steps but it is really easy to do and you can decorate as much or little as you want.

I created this box for today's SCS technique lover's challenge  (come join in if you are inspired!)

Here is my box: I used some designer paper from deep in my stash to decorate my box and Stocking Set 2 and Stocking Dies from Prickley Pear Stamps

Here is the inside:

I hope you are inspired !!

Hugs,
Lyn

Saturday, December 16, 2023

'Tis The Season To Be Jolly

Hey everybody! Happy Saturday! I hope you have something fun planned this weekend... and if you're a crafter, maybe you have some crafting up your sleeve?! I'm definitely doing some of that here today! Leslie here, sharing another inspiration project featuring the Snowflake Pendant die and Snowflake Inserts stamp set. I totally love these because the snowflake is large and definitely takes charge on any project! I love cards with apertures so I cut a large circle in the front flap for the snowflake to show through.


The card base was cut from white cardstock and I used two blue coordinating prints for the front and inside layering panels. I used nested circle dies for the large and small circle die cuts. I adhered three snowflake die cuts together (cut from metallic blue cardstock using the Snowflake Pendant die) which I embellished with blue gemstones. The sentiment from the Snowflake Inserts stamp set was stamped in blue ink. The finishing touch was adding white die cut corners embellished with blue gemstones. 


Prickley Pear Stamps products used:
Snowflake Inserts stamp set
Snowflake Pendant die 

Thanks so much for stopping by today - we'll see you again soon!

Scrappy hugs,
Leslie
Blog / Facebook / Instagram / Pinterest / Twitter

Tuesday, December 12, 2023

Merry & Bright Cactus!

Hello everyone! Judy here today with a special card for my desert family! While lots of snowmen and snowy trees and holly berries abound, I wanted to make a cactus card, as I am from Arizona. While I have not lived there in many years, it still holds my heart!

Today I am using the Prickly Pear Cactus Stamp Set and Dies. I smooshed the background with watercolors, and then "messy" painted my images with Kuretake Paints. The sentiment stamps perfectly, but ended up on a watercolor splatter! I wrapped gold metallic thread around the top of the pot and added Kaisercraft Pearls to the blossom tops (a spring thing, yes, but... it's Christmas magenta!). An embossing folder added the texture to the middle panel. 

You can find more of my projects at my blog, Joy in a JAR, or on Instagram at @joy_in_a_jar. Thanks for stopping by today!

Monday, December 11, 2023

And the Stockings Were Hung...

For my project today, I am using a stocking and bow from the Stocking Two Stamp Set. After I colored it, I die cut it with the coordinating Stocking Die and then I sat and looked at it for a few days hoping for inspiration on what the card should look like. It eventually came to me and I created my card around my colored up image....Do you ever do that?


I created a pocket card. As I have strived to do all year, I reached for scraps. I used some of my red scraps to create bricks, then I built a "fireplace." I added glue in the cracks and sprinkled glitter to create "grout". Then I added wood like designer paper to the fold down flap to create a mantle. I added some paper I thought could pass as "wallpaper" "on the back then I sealed the two sides with thin score tape. Then I hung my stocking with a little brad act as my nail.

I created a coordinating note card that I can write a note on and maybe glue a gift card on. Then I can just slide it down in the pocket. The card is kind of simple but I really love the sweet little scene and I I can't wait to get this one in the mail - yes, you heard right. I haven't sent my cards yet. Please don't judge, I plan to do them by Wednesday haha!!

I hope you were inspired today and I hope you are having a wonderful holiday season.

Hugs,
Lyn

Friday, December 1, 2023

It's the most wonderful time of the year

Hey everybody! Happy Friday AND Happy December 1st! Can you believe it?! Leslie here, with an inspiration project to share with you today featuring the Flourished Oval 3 - Holidays stamp set along with the Flourished Oval Die and Flourished Oval Nesting Dies! This was a super easy (and fun) card to put together with some whimsical Christmas papers I had in my stash.


The card base was cut from white cardstock and layered with a panel cut from a Christmas paper collection in my stash which already had faux lace and off-kilter horizontal flags across the bottom that I thought looked so cute with the stamped snowmen! I used the Flourished Oval 3 - Holidays stamp set along with the Flourished Oval Die and Flourished Oval Nesting Dies to create the focal image. I also used a journaling card from the Christmas paper collection to layer the focal image. The finishing touches were an off-kilter vertical flag cut from a leftover strip and some iridescent gemstones.


Prickley Pear Stamps products used:
Flourished Oval 3 - Holidays stamp set 
Flourished Oval Die 
Flourished Oval Nesting Dies

Thanks so much for stopping by today - we'll see you again soon!

Scrappy hugs,
Leslie
Blog / Facebook / Instagram / Pinterest / Twitter

Tuesday, November 28, 2023

Christmas Tags in Non-Traditional Colors

Hey everybody! We're on the downslide into December and I hope you all had a very happy Thanksgiving! This month has flown by and Christmas is on our heels! Leslie here, sharing a super fun set of Christmas gift tags in non-traditional colors! I used the Christmas Holiday Gift Tags stamp set and Gift Tags Dies along with the Nesting Tag Dies. I pulled out a variety of markers to color these beauties and I love how they turned out! I'm always down for using non-traditional colors for my Christmas projects! 


I stamped all five images from the Christmas Holiday Gift Tags stamp set in gray ink and then again in Versamark, and heat embossed them with clear embossing powder. I used a variety of bold colored markers to color the images, cut them with the coordinating Gift Tags dies and added tiny red gemstones to several of them.I used the Nesting Tag dies and cut a tag from purple, pink, orange, green and gray cardstock. I backed each one with a tag cut from white cardstock, stamped 'To and From' on the back of each one in gray ink, and adhered the images. I punched a 1/4" hole at the top of each tag, threaded a coordinating color ribbon through the hole at the top, and tied it (along with a piece of knotted silver string) with white twine. 


Prickley Pear Stamps products used:
Christmas Holiday Gift Tags stamp set
Gift Tags dies
Nesting Tag dies

Thanks so much for stopping by today - we'll see you again soon!

Scrappy hugs,
Leslie
Blog / Facebook / Instagram / Pinterest / Twitter

Monday, November 27, 2023

Christmas Postage Stamp

Today I have a simple, sweet card using the "extra" pieces from the Christmas Ornaments 2 set.

I wanted to make a Christmas postage stamp with a die from way back when so I created a little vignette to fit it. I die cut it and with the die on, I lightly brushed light blue ink over the scene so when I removed the die, there was a white frame - like a real postage stamp. I think it turned out so cute. I think I may look at other stamp sets to see if I can find something else that will fit into my postage stamp look. I used a stencil background and created my own colored card with Distress Ink

I hope you are inspired!

Hugs,
Lyn

PS – Prickley Pear is having a Cyber Monday Sale – No Coupon needed


Sunday, November 26, 2023

Miss You

Hello everyone! Judy here today with a last fall card for this year! I hope you had a wonderful weekend and Thanksgiving!

Today I am sharing a card made for myself sister who lives very far from me. I don't know the last time we had Thanksgiving together, but she will like this sweet woodland cardinal since she lives in the desert!

I am featuring the All About You Cardinal Clear Stamp Set. I stamped with VersaFine Clair Nocturne ink, and then embossed with Clear Embossing Powder. I colored my image with Copic markers. A little twine and some gems keep a rustic and classic feel to the design.

Don't forget that stamps and dies are 20% off through tomorrow at midnight (11/27 EST)! You can get this sweet little set for such a deal!


You can see more of my projects on my blog at Joy in a JAR.

Thursday, November 23, 2023

Rotating Center Circle Snowflake Fun Fold

Hey everybody! Today is the day for Giving Thanks and I hope you all have a wonderful day with family and/or friends, and get stuffed to the gills with yummy food, lol! Leslie here, with an inspiration project to share featuring the Snowflake Pendant die and Snowflake Inserts stamp set! OMGosh, these are some ah-maazing products which I quickly fell in love with! And this rotating center circle fun fold was a blast to make and it didn't take me long to make a couple more! I'm happy to share the video where my inspiration came from HERE if you're interested. It looks complicated but it isn't really, and it sure packs a punch!


The square card base was cut from teal cardstock and I used some pretty snowfall 6x6 double-sided papers for the layering panels. I layered two snowflake die cuts together (cut from dark and medium teal shimmer cardstock using the Snowflake Pendant die) and stamped the sentiment from the Snowflake Inserts stamp set on light teal cardstock in teal ink. I used some ephemera alpha stickers in my stash for the 'Deck the Halls' sentiment on the frame along with quite a few embellishments and sequins in my stash to give it lots of bling. 


Here's a few-second video showing what it looks like opening and closing. I L-O-V-E it!


Prickley Pear Stamps products used:
Snowflake Pendant die 
Snowflake Inserts stamp set

Thanks so much for stopping by today - we'll see you again soon!

Scrappy hugs,
Leslie
Blog / Facebook / Instagram / Pinterest / Twitter

Wednesday, November 15, 2023

Tone-On-Tone NOEL

Hey everybody! Happy Wednesday - I hope you're having a wonderful week! Leslie here, sharing an inspiration project featuring the beautiful Christmas Trees 2 stamp set and Tree die! There are SO many options for creating pretty projects with these stamps! I chose to do a tone-on-tone mini slimline using the trees to spell out NOEL, and I love how it turned out! I spritzed some chameleon powder mixed with water over the white heat embossed trees just to give them a little color!


I cut a 3-1/2" x 6" mini slimline card base from white cardstock along with a three-layer die cut frame (using a frame die in my stash) from a white shimmer cardstock. I reserved the inner portion of one of the frame die cuts to put back into the center when assembling the card front. I stamped one of the trees from the Christmas Trees 2 stamp set four times on the white shimmer cardstock and heat embossed them with white embossing powder. I spritzed some chameleon powder mixed with water in a mini mister over the white heat embossed trees and then once dry added the N-O-E-L letters cut from the white shimmer cardstock using some alpha dies in my stash. I adhered the trees to the card front using 1/2" double-sided foam strips and added several gemstones. 


Prickley Pear Stamps products used:
Christmas Trees 2 stamp set 
Tree die

Thanks so much for stopping by today - we'll see you again soon!

Scrappy hugs,
Leslie
Blog / Facebook / Instagram / Pinterest / Twitter

Monday, November 13, 2023

Holly Jolly Christmas

 Today I have another project using the Holly Jolly Christmas set. This one though is completely different from the snowmen selfies....

For this one, I went with an easy, messy, watercolor look using a few green shades of Distress ink and Festive Berries red to fill in the berries...I embossed the sentiment with copper powder (that was what I had on my desk haha) onto vellum, and die cut it with a banner die. Super easy and pretty satisfying to make.

Thanks for stopping by! I hope you like this one and are inspired to try different looks from your stamps - it stretches them further and you as well :)

Hugs,
Lyn

Saturday, November 11, 2023

Let It Snow!

Hello everyone! Judy here today with a no fuss, CAS (clean and simple), mailable holiday card! I have a couple of friends who I think would love this style. I love black and kraft together (well, kraft and anything, really!) and I think this turned out super cute. It would be a very easy to mass produce if you wanted to make a lot of cards!

I used the adorable snowmen and matching sentiment from the Zipper Card Christmas Clear Stamp Set. I used my favorite VersaFine Clair Nocturne ink on the kraft cardstock, and finished with a baker's twine bow wrap in chilly, snowy aqua!

Next week I have an actual zipper card to share, so stay tuned! You can find more of my projects on my blog at Joy in a JAR.

Wednesday, November 8, 2023

Prickley Pear Stamps' Be Merry Instagram and YouTube Hop and Giveaway


Welcome back to Prickley Pear!  We are so excited to share our holiday inspiration with you today while having two hops today, one on Instagram and one on YouTube!   Our designers have come up with gorgeous inspiration for you and what 's even more more fun you will have the opportunity to win one of (two) $25 store credits by participating in the hops.  Be sure to follow, like and comment on the entries along the hop trail!  We sure hope  you enjoy it!  


Here are a few sneak peeks you will see along the way!!! 


There will be much more inspiration along the way and we can't wait for you to spend some time with us.   
Start the Instagram hop HERE
Start the YouTube hop HERE

GIVEAWAY: Leave a comment and a "like" and follow each designer at each hop stop for a chance to win a $25 gift card from Prickley Pear Stamps! P. A winner will be chosen randomly from all comments left by November 15 at 11:59PM EST. 
The winner will be announced on Prickley Pear the YouTube on November 17th! 


FTC Disclaimer: This Giveaway is not in any way associated or affiliated with YouTube or any other company. Prickley Pear Stamps sponsors all giveaway products. The official rules for this Giveaway: *All entrants must be 18 years of age (or older) to participate. *This contest ends on Monday, November 15t, 2023, at 11:59 pm ET. We will announce a winner on November 17th , 2023, on the Prickley Pear Stamps Channel , so be sure to check back! This Giveaway is wholly compliant and consistent with the YouTube Terms of Service and is solely sponsored by Prickley Pear Stamps.  


Enjoy the hop and happy crafting!!

Monday, November 6, 2023

You are Loved! Simple Watercolor Technique

Today I am doing some simple stamping with "water color" and the Love and Prayers Set.


I used a technique from this blog HERE . Essentially, you add some water based inks (I used Distress Inks in Picked Raspberry, Milled Lavender, and Dusty Concord) to a kraft mat, spritz it, and the use that as an 'ink pad' to ink up your stamp. It gives you a loose, water color affect. And better yet, you do not have to be exact about this!

The word art stamp in this set is 3.5"x3.5" so I stamped it randomly on some Strathmore Bristol paper, to fully cover an A2 sized background. Then on a separate piece of Bristol, I "smooshed" some of the remaining ink and lined up one of the sentiment stamp to create a square border. I found a square stitched die slightly larger than my border and cut it out and mounted it and my background onto some navy cardstock. I added the heart into the middle and colored it with the darker ink from my kraft mat. I stacked it all and added it to a side folding card.

I think I will be playing around with this technique a few more times this month. It feels clean and simple but not but what what do you think?

Thanks for stopping by!! I hope you are inspired!

Hugs,
Lyn


Friday, November 3, 2023

November 3, 2023, Cardinals CLR005 Stamps, Cardinals 2 CLR005A Stamps and Cardinal PPRS-D005 Die

Hey everybody, happy Friday! I'm still working on Christmas projects which I do all year long. How about you... have you started on them, are you plugging away, or are you finished? Leslie here, sharing an inspiration project featuring the absolutely gorgeous Cardinals and Cardinals 2 stamp sets along with the coordinating Cardinal die and the Heart Oval Insert die. This CAS-ish vintage card is a super simple design that would be so easy to mass produce for everybody on your Christmas list.


I cut a standard A2 size side-folding card base from ivory cardstock along with layering panels from kraft paper and two coordinating patterned papers. I tore the top edge of the three layering panels and adhered them to the card base. I stamped the floral music image from the Cardinals stamp set on the left edge and the sentiment from the Cardinals 2 stamp set on a scrap piece of ivory cardstock, both in brown ink, and cut the sentiment with the Heart Oval Insert die. I traced around the outside edge of the oval die cut with a pencil onto a scrap piece of kraft paper, hand-cut it just inside the tracing line, and adhered it behind the die cut. I stamped the cardinal in black ink on red cardstock and cut it with the coordinating Cardinal die. I die cut two additional cardinals and adhered them on top of one another for a little dimension, and then adhered them to the card front. The finishing touch was adding several small red gemstones.


Prickley Pear Stamps products used:
Cardinals stamp set 
Cardinals 2 stamp set
Cardinal die
Heart Oval Insert die

Thanks so much for stopping by today - we'll see you again soon!

Scrappy hugs,
Leslie
Blog / Facebook / Instagram / Pinterest / Twitter

Tuesday, October 31, 2023

October 31, 2023, Ornaments 2 CLR010A Stamps

Hey everybody! Are you ready (or getting ready) for Christmas? I've been making Christmas cards all year long and I'm still making them! Leslie here, sharing another inspiration project featuring the beautiful Ornaments 2 stamp set. I created a mini slimline featuring three clusters of hanging snowflakes and I really love how it turned out!


I cut a 3-3/4" x 6" mini slimline card base from white cardstock. Using a mini slimline fancy scalloped die in my stash, I cut a white panel for the front. I also cut a frame from teal cardstock using a frame die in my stash. I stamped three clusters of hanging snowflakes and a sentiment from the 
Ornaments 2 stamp set in teal ink. I added teal gemstones to the center of each snowflake, and the finishing touch was adding several teal enamel dots.


Prickley Pear Stamps products used:
Ornaments 2 stamp set

Thanks so much for stopping by today - we'll see you again soon!

Scrappy hugs,
Leslie
Blog / Facebook / Instagram / Pinterest / Twitter

Thursday, October 26, 2023

Farm Truck Animals CLR069B & Dies PPRS-DO69


Happy Fall Friends! Tia here with you from RockyMtnCraftia.com I love Fall and "sweater-weather"! and creating Fall themed cards! Today's DT-creation is taking a break from all the spooky and getting down to the best part of the season-the gorgeous changing colors of the leaves! 

Who better to enjoy a drive in the country then all the animals from the farm! The Farm Truck Animals stamp set is crazy adorable and I can already imagine a zillion zany card creations with it! And please don't forget BOTH coordinating die sets! The Farm Animals Die and the Truck Die.


I also highlighted my animal TRIO by die cutting a piece of green gingham paper with the Scallop Circle Nesting Die Set.
I've just started focusing on using more design paper in my cards! I have too many stacks of old paper (more than I can probably use in this lifetime!) and it's time to splurge! This was a pack of papers themed Seasons from Jo-Ann stores. I selected several of the matching designs and created my card around using all of them. 

After stamping, coloring and die cutting out the Farm Truck & Animals, I popped them up with foam tape and adhered to my die-cut scalloped circle. I chose green to break the scene up (getting a bit orange) and I loved the one falling green leaf.

I also popped the orange banner up and love that it created a canopy over the truck! It turned out to be a larger card than I usually create being a bit odd-ball at 5.25 x 6in.  But sometimes the card just calls for more space! 

Thanks for following along with me! I hope your inspired to create some Fall-scenery cards too! If you do make sure to share them over on the group Facebook page.

To see more cards from me, head on over to my site @rockymtncraftia.com and remember to take some time for you today and GO-GET-CRAFTY!
-Tia


Tuesday, October 24, 2023

Ho Ho Ho!

Good morning everyone! This week I am all about pink! I seem to keep making pink cards, even though that isn't a "plan." It is my favorite color, though, so not a surprise, I guess!

Today I am sharing the ADORABLE reindeer from Prickley Pear Stamps' Santa and Rudolph. I stamped with VersaFine Clair Nocturne (can't beat the black crispness) and then quickly embossed with Clear Embossing Powder. That sets the ink (non-marker friendly) and then I am able to color with alcohol markers without the black ink smearing. The Coordinating Die cut her out perfectly! Same with that cute sentiment!

I added some things from my stash: patterned paper, a little doily, baker's twine, and sequins, and a few snowy layers. I love her pink sweater and think she's so cute!

You can see more of my stamping projects on my blog at Joy in a JAR. Thanks for stopping by!