Showing posts with label Copics. Show all posts

Wednesday, November 8, 2023

Prickley Pear Stamps' Be Merry Instagram and YouTube Hop and Giveaway


Welcome back to Prickley Pear!  We are so excited to share our holiday inspiration with you today while having two hops today, one on Instagram and one on YouTube!   Our designers have come up with gorgeous inspiration for you and what 's even more more fun you will have the opportunity to win one of (two) $25 store credits by participating in the hops.  Be sure to follow, like and comment on the entries along the hop trail!  We sure hope  you enjoy it!  


Here are a few sneak peeks you will see along the way!!! 


There will be much more inspiration along the way and we can't wait for you to spend some time with us.   
Start the Instagram hop HERE
Start the YouTube hop HERE

GIVEAWAY: Leave a comment and a "like" and follow each designer at each hop stop for a chance to win a $25 gift card from Prickley Pear Stamps! P. A winner will be chosen randomly from all comments left by November 15 at 11:59PM EST. 
The winner will be announced on Prickley Pear the YouTube on November 17th! 


FTC Disclaimer: This Giveaway is not in any way associated or affiliated with YouTube or any other company. Prickley Pear Stamps sponsors all giveaway products. The official rules for this Giveaway: *All entrants must be 18 years of age (or older) to participate. *This contest ends on Monday, November 15t, 2023, at 11:59 pm ET. We will announce a winner on November 17th , 2023, on the Prickley Pear Stamps Channel , so be sure to check back! This Giveaway is wholly compliant and consistent with the YouTube Terms of Service and is solely sponsored by Prickley Pear Stamps.  


Enjoy the hop and happy crafting!!

Thursday, October 26, 2023

Farm Truck Animals CLR069B & Dies PPRS-DO69


Happy Fall Friends! Tia here with you from RockyMtnCraftia.com I love Fall and "sweater-weather"! and creating Fall themed cards! Today's DT-creation is taking a break from all the spooky and getting down to the best part of the season-the gorgeous changing colors of the leaves! 

Who better to enjoy a drive in the country then all the animals from the farm! The Farm Truck Animals stamp set is crazy adorable and I can already imagine a zillion zany card creations with it! And please don't forget BOTH coordinating die sets! The Farm Animals Die and the Truck Die.


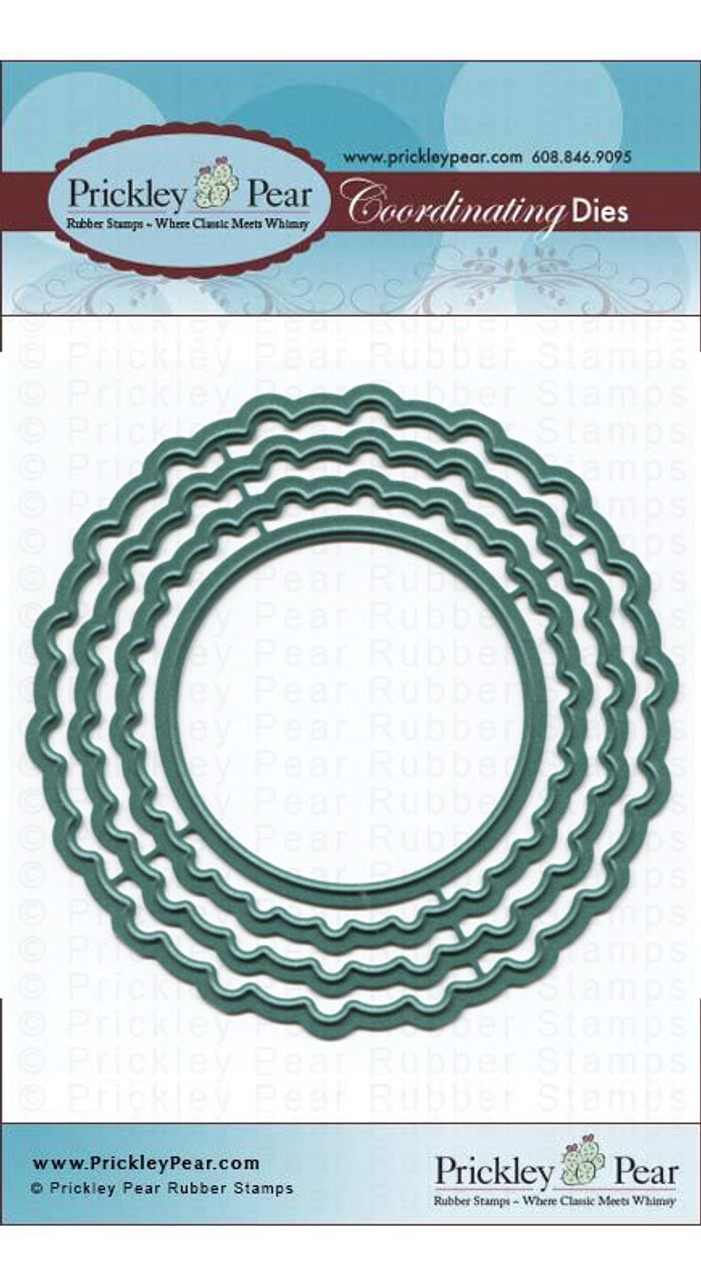
I also highlighted my animal TRIO by die cutting a piece of green gingham paper with the Scallop Circle Nesting Die Set.
I've just started focusing on using more design paper in my cards! I have too many stacks of old paper (more than I can probably use in this lifetime!) and it's time to splurge! This was a pack of papers themed Seasons from Jo-Ann stores. I selected several of the matching designs and created my card around using all of them. 

After stamping, coloring and die cutting out the Farm Truck & Animals, I popped them up with foam tape and adhered to my die-cut scalloped circle. I chose green to break the scene up (getting a bit orange) and I loved the one falling green leaf.

I also popped the orange banner up and love that it created a canopy over the truck! It turned out to be a larger card than I usually create being a bit odd-ball at 5.25 x 6in.  But sometimes the card just calls for more space! 

Thanks for following along with me! I hope your inspired to create some Fall-scenery cards too! If you do make sure to share them over on the group Facebook page.

To see more cards from me, head on over to my site @rockymtncraftia.com and remember to take some time for you today and GO-GET-CRAFTY!
-Tia


Monday, August 14, 2023

Fully Rely on God

Hey there Prickley Pear fans we have another adorable image for you!  This is Ramona having her time with the Lord.  What a great image for all your bible study notecards or magnets.  Be sure to grab your stamp today!


Monday, August 7, 2023

Christmas with Spinach and Ramona

Hi there Prickley Pear fans!  Charlene here with the cutest little Christmas image yet!  Spinach and Ramona are so adorable dressing their tree with all the festive goodies!  I hope you will hop on over to Prickley Pear and grab your stamp today!


Thursday, June 29, 2023

Sketched Florals CLR248

 Hey friends today I am sharing this beautiful sunflower stamp.  I had no idea that sunflowers came in so many colors.  I did a little google search and picked out the one I thought was the prettiest to color up.  This particular image does have a coordinating die PPRS-D48.


I have colored my image with copics on Cyogen White cardstock. I used a water brush with alcohol in it  to do the background in between the stems, by adding B01 on acetate and then brushing lightly. The background clouds on the top are done by ink blending.

Copics used:

Flower: R56, R59, Y18
Stems: YG01, YG17, YG67 

I hope you have a great day and find some time to get creative it is good for your soul!

Thursday, June 8, 2023

Sketched Florals - Sunflower

Hi there Prickley Pear Pals...Charlene here sharing with you a beautiful Sunflower! 
I am excited to am so excited to say I will actually be in Kentucky at Prickley Pear on June 15th doing a card class on this particular image Sketch Florals - Sunflower CLR248 


I colored m image with copics and then I took B00 and scribbled on acetate and used a colorless blender to do the background in between the flower stems.  

Copics used:
Sunflower Y11, Y15, Y38, E23, E29
Flower stems YG03, YG17, YG67
background done with a cloud stencil and Marina Madness Hybrid ink.

Have a great day all!

Hugs, Charlene


Wednesday, May 24, 2023

Wednesday May 24, 2023 Birthday Banners-CLR062D + Banner Die Set PPRS-D062


Welcome Friends, it's a Woot-Woo Wednesday! And to celebrate, I'm pulling out the banners! Hi all, Tia here from RockyMtnCraftia.com. Today I've got a birthday card that really shows the recipient just how excited you are for them. And it's all thanks to the Birthday Banners Set! Nothing shouts louder (in a card) your excitement then banners rolling out of an envelope with balloons and confetti. So let's get started!

I started with paper. In my stash I found this bright, playful polka-dot pattern paper. I like that the colors were bright, but not primary colors. I matched gorgeous orchid colored cardstock for the base and envelope. The background of the design paper was off white, so I decided to cut my banners out of Very Vanilla cardstock. Next came COPIC selection. Again, I matched COPICS with the colors in my design paper.

COPIC COLORS

Pink: RV13;RV25

Purple:V12;V04;V06

Orange: YR16;YR04

Green:YG03; YG25

Blue: B00; B12; B21

For the very fine lines I used Staedtler Triplus Fineliners in: Lt. Green, Mid-Green; Mid-Pink; Plum; Lilac and Warm Gray.

I selected the banners I wanted from the set and stamped them with Contour Ink from Hero Arts. I really wanted the colors to pop and went for a no-line coloring technique. Contour Ink is a hybrid ink intended for no-line coloring.

I used the Banners Die Set from Prickley Pear Stamps to cut out my banners and arrange them in my mini-envelope. The envelope in a gift set, I kept it and opened it flat to create a template from. There are lots of  YouTube videos on how to create envelopes, as well as dies on the market.

I then fit the banners into the envelope (cutting the ends to help them fit) and popped them up with foam tape. 

Since the Banner stamp already had the word "Happy", I die cut the word birthday from black cardstock. I decided that looked bolder than I wanted and added another layer cut from Melon Mambo on top-so now it looked shadowed. I deckle cut a background boarder and attached it all to an A2 sized card base.

I love the energy of this card and hope you like it too! The Birthday Banners set has such great energy and this card idea would be easy to alter for Anniversary, Wedding/Baby Shower, Retirement/Graduation etc.! And once you get the Banners Die Set, there are several other Banner stamp sets in the store! Check them all out here: Banner Sets.

As always, I'd love to see what you're working on-so come join us over on the Facebook group at: https://www.facebook.com/groups/PrickleyPearPals

Thanks for following along and until next my friends-

Go-Get-Crafty!

-Tia


Saturday, May 20, 2023

May 20, 2023 Build A Bird-2 CLR003A


 Happy Saturday Friends! Tia here from RockyMtnCraftia.com, popping in today. I'm back featuring another card idea with the Build-A-Bird-2 set. I've got a whole new layout and another of the bird stamps on this card!

It's been nice taking a break from my craft studio remodel! While moving ALL of my crafty goodness in and out of the room, I've been re-familiarized with some papers I didn't remember! Including this gorgeous foiled diamond paper. And it was the inspiration for today's spinner card! WOW! I hadn't made one of these cards in awhile.

I started by adhering my background paper to my card front (an A2 sized card-4.25 x 5.50). I used 2 hexagon nesting dies to create the pink design paper "frame". Then using the inside die, I opened up my card and laid it out in my die cutting machine, so it would cut the hexagon shape through the card front. You can use that discarded piece of paper inside you card, but I chose to use the pink design paper.


For our bird stamp, I used Angel Pink Memento ink and embossed with clear powder. I used COPICS to fill in the open areas with (YG03; RV08 & RV09) and die cut. I die cut an additional piece that I embossed for the backside of the bird when it spins.

On the inside of the card I laid my bird front and taped thread from the top and bottom of the card and taped it closely to the window. I used a 2nd "frame" glued down to secure the thread. Lastly, I glued to backside of the bird, creating a "sandwich" with the thread. When your ready to send, simply spin the image and when the recipient opens the card the image-spins!


I used sentiments from the stamp set for my message and die cut some foliage under the frame for added texture and dimension. 

The Build A Bird 2 Stamp set is so beautiful and versatile. It's been a pleasure creating this set of card and sharing them with you. 

Thanks again for checking in and following along! I hope you're inspired to spend some time in your crafty space and try your hand at a spinner card! If you do, come share it on the Prickley Pear Facebook Group page and tag me! 

Now Go Get Crafty!
-Tia


Tuesday, January 31, 2023

January 31, 2023 - Snow Family Stamp Set CLR231

Hello Prickley Pear Friends!!

Kendra here to share a card featuring the cute Snow Family (CLR231) stamp set! 

We've been having such a mild winter.  The kids have been dreaming of snow, so we can play in it!

I decided to grab the Snow Family (CLR231) stamp set and create my own winter scene:
I stamped three of the cute images on a die cut layer and then colored them with my Copics.

I love pink, purple and teal! 

I love that with this stamp set you can stamp as many snowman/women you want to create your family!

So sweet!

Have a beautiful day! 


Sunday, January 29, 2023

January 29, 2023 - Love You Stamp CLR275 and Love You Die PPRS-D275

Happy Sunday Prickley Pear Friends!

Kendra here from Luv 2 Scrap n' Make Cards, as promised I have another awesome Valentine to share with you!

I'm once again using the  Love You (CLR275) stamp set and coordinating Love You Die (PPRS-D275) set!

This time I stamped out one of the pattern 'Love' words and the pattern 'You'.  I then colored them with my Copics.

I love pink and teal together!!

So pretty!!  I die cut a few layers and then used pop dots to pop up the words on the front!

I enjoy creating mini slimline cards!

The Love You stamp set is perfect for Valentine's Day card!  Can't believe it is right around the corner!!

Have a beautiful day! 


Thursday, November 10, 2022

Rudolph and his adorable sweater

  It's day 2 of the new "Rudolph and Santa" release at Prickley Pear Stamps.  This little Rudolph is so cute I just can't get enough of him! 

The set comes with 10 stamps and 5 sentiments and coordinating dies.


I had so much fun creating this card.  I have colored my image with copics on Premium coloring paper from Sweet Sentiment. I added some snowflakes(one of the stamps in the set)  I used chucky embossing powder for the snow.

Copics used:
Red - R22, R24, R27
Brown - E34, E35, E57, E79
Skin - E50, E51
Black - C5, C7, C9
Grey - C00, C1

Thanks for stopping by and I hope you have a great crafting day!

Hugs~Charlene

Wednesday, November 9, 2022

HoHoHo

 It's beginning to look a lot like Christmas at Prickley Pear Stamps!  I am just now starting my Christmas cards, and this little set is just perfect! I love the little sweater on Rudolph♥ The set comes with 10 stamps and 5 sentiments and coordinating dies.


I had so much fun creating this card.  I have colored my image with copics. I added some fun flock to Santa's suit. I embossed the background and then added a die cut mountain scene and added glitter to it.  

Copics used:
Red - R22, R24, R27
Brown - E34, E35, E57, E79
Skin - E50, E51
Black - C5, C7, C9
Grey - C00, C1

Thanks for stopping by and I hope you have a great crafting day!

Hugs~Charlene

Wednesday, October 19, 2022

Cupcake Celebration!


Happy Woot-Woo-Wednesday! Prickley Pear Fans! Tia here from RockyMtnCraftia.com. I don't know which I love more, birthdays or cupcakes. But when you bring them together...that's a party! Today we're creating one of  those much needed birthday cards for your stash. I know you're busy making the "holiday cards", but take a break with me for a little Cupcake-Celebration!


Today's design team card features the stamp set: Build A Cupcake and the Cupcake Die.


The Design:

This was a really fun and fast card to make. I've been eager to "build a cupcake" with this super cute and ingenious stamp set. I love sets like this-that give you SO many creative options! Talk about bang for your buck!

I keep all of my birthday themed design papers, tags, stickers and embellishments in one storage container. There I found some Project Life cards that made me smile. I pulled matching cardstock in teal, orange and red for my card base. I threw out the red & orange cardstock after I looked at my embellishments and decided I wanted to use red sequins.

Coloring:

Next I built my cupcake (yes, I'm seriously smiling right now!) it really was fun! I stamped my image with London Fog-Memento Ink (Copic Friendly). With the light colored lines I wanted to do no-line coloring.


COPIC COLORS:

Top: C1; E35; E57; E29
Candies: R17; R29; White Gelly Roll Pen
Wrapper: Y08; YR14; BG10; BG23; BG13

The Layout:

After coloring both pieces, I die cut the images with the coordinating dies. I love that the die set cuts close to the images! No excess to trim away.

I created an A2 card base (4.25 x 5.5in) from Bermuda Bay cardstock. I offset both cards, letting them hang off the edges and then trimmed off the overhang. I added foam tape to the back of the cupcake and glued sequins around it . I finished my card by wrapping the top with a piece of white organza ribbon (just like a gift!).


I completed this birthday card using the 'Happy Birthday' sentiment from the set stamped onto a scalloped oval die from Prickley Pear and adhered inside.

Thanks for taking a break from your "holiday" cards to follow along with me and make this cute birthday card!

Now stop dreaming about cupcakes and...

Go get crafty!
-Tia


Tuesday, August 23, 2022

Mistletoe Message

Hi Prickley Pear Friends! I'm Tia from rockymtncraftia.com. I'm the newest member to the Prickley Pear Family and am SO excited to be here! For my DT debut, I went right to the good stuff...Christmas! I've never been a Christmas in July card maker but this year I was talked into trying by several crafty friends. Turns out it was easier and more addictive than I thought! And now that I've started, I've vowed to keep going until the very end (end of my card recipient list!) 

My card today features the gorgeous Victorian Ornaments 3 set! I love mistletoe and knew I wanted a card for my husband. I came up with the sentiment and created a MS-Word document. After printing it out on the die-cut cardstock frame, I used a little distress ink to create a "glow" where my ornament would be.

I stamped with gray-ink (for the no-lines effect), colored the ornament and fussy cut it out (how did I miss the die for it in the store!) and then attached it with foam tape for dimension. I topped it off with double bows of gold thread. I die-cut the additional vine & berries to break-up the white background and draw attention to the focal image and sentiment.

COPIC Markers Used:
Ornament: Y00; Y11; Y15; YR23
Ribbon: R59; R29; R27; R22
Mistletoe: YG11; YG17; YG25; White Gelly Roll Pen

If you haven't started on your Holiday card-making, I hope I inspired you to start! There are several beautiful ornament sets in the Prickley Pear store-so get them before they are gone. With only 124 days left until Christmas, I've already got another card idea brewing with this set-so come back for more! But more importantly-go create something beautiful!

See you soon!
                -Tia


Sunday, August 14, 2022

Happy Beach Critters

Hi there Prickley Pear fans, Charlene here sharing with you this cute little creation using "Happy Beach Critters"  These little critters are absolutely adorable with many possibilities.  I have jumped on the latest thing going and made a memory dex card!  I really like the idea of these as they would be perfect for swaps or just to have on your desk to look through.


 I have colored the images with Copics on Hammermill Color Copy Cover card stock.  I used Graphic 45 "By the Sea" paper.  I hope you all have a great day and find some time to get creative it is good for your soul♥