Showing posts with label Rockymtncraftia. Show all posts

Thursday, October 26, 2023

Farm Truck Animals CLR069B & Dies PPRS-DO69


Happy Fall Friends! Tia here with you from RockyMtnCraftia.com I love Fall and "sweater-weather"! and creating Fall themed cards! Today's DT-creation is taking a break from all the spooky and getting down to the best part of the season-the gorgeous changing colors of the leaves! 

Who better to enjoy a drive in the country then all the animals from the farm! The Farm Truck Animals stamp set is crazy adorable and I can already imagine a zillion zany card creations with it! And please don't forget BOTH coordinating die sets! The Farm Animals Die and the Truck Die.


I also highlighted my animal TRIO by die cutting a piece of green gingham paper with the Scallop Circle Nesting Die Set.
I've just started focusing on using more design paper in my cards! I have too many stacks of old paper (more than I can probably use in this lifetime!) and it's time to splurge! This was a pack of papers themed Seasons from Jo-Ann stores. I selected several of the matching designs and created my card around using all of them. 

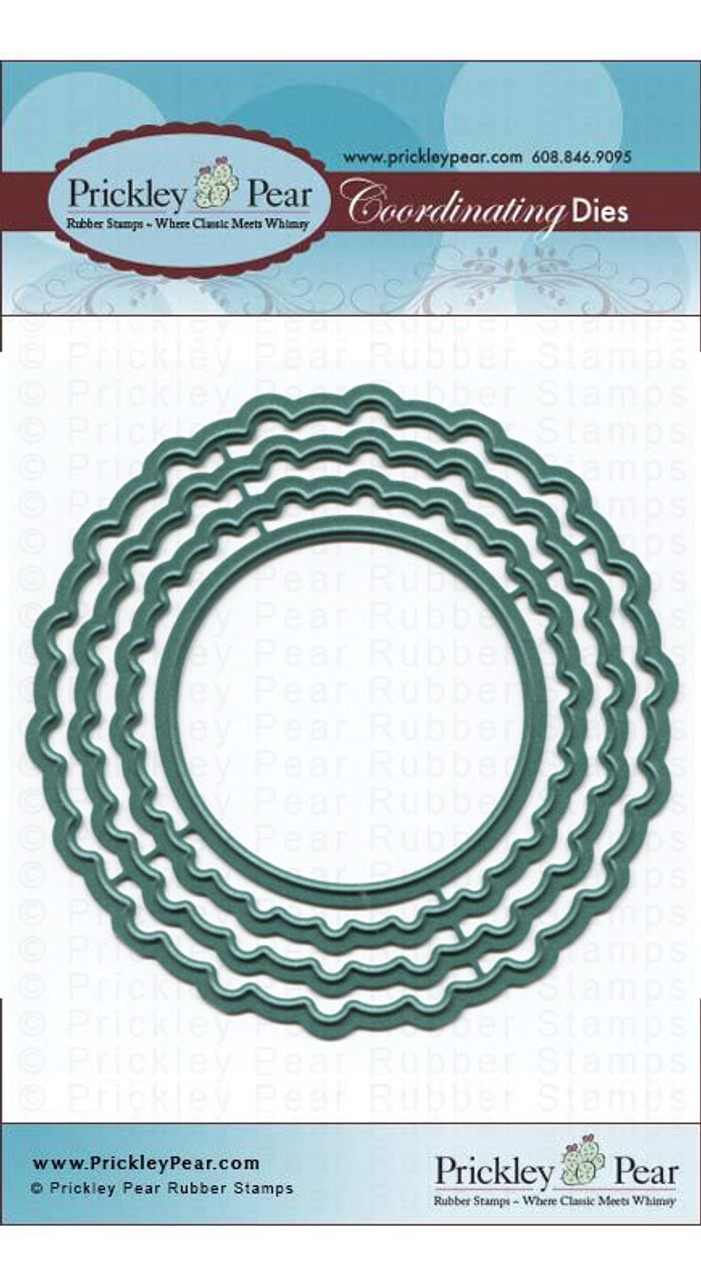
After stamping, coloring and die cutting out the Farm Truck & Animals, I popped them up with foam tape and adhered to my die-cut scalloped circle. I chose green to break the scene up (getting a bit orange) and I loved the one falling green leaf.

I also popped the orange banner up and love that it created a canopy over the truck! It turned out to be a larger card than I usually create being a bit odd-ball at 5.25 x 6in.  But sometimes the card just calls for more space! 

Thanks for following along with me! I hope your inspired to create some Fall-scenery cards too! If you do make sure to share them over on the group Facebook page.

To see more cards from me, head on over to my site @rockymtncraftia.com and remember to take some time for you today and GO-GET-CRAFTY!
-Tia


Saturday, September 9, 2023

September 9, 2023 Steampunk Gears 3 - CLR025B

Happy Saturday friends! Have you ever had a "happy accident" occur while crafting? Tia from RockyMtnCraftia.com here with you! Well, I sure have and today's card is the outcome of one.

I was working on another project and part of it was printed from my HP Laser Jet printer. I was playing around with sticky embossing powder and glue to do some hot foiling when low and behold...the foil stuck to the image I had printed!

I recently picked-up the Steampunk Gears 3 set and thought it would be so cool to foil the gears for a real metallic look!

I absolutely LOVE this sentiment from the set; "If nothing ever changed there would be no butterflies". I stamped and matted it on blue cardstock and set aside. I created a traditional sized slimline card of 3.5x8.5 in. with Navy cardstock. On top of that I adhered design paper that looked like a cloudy sky. Lastly I used a Gears Embossing Folder from Cuttlebug (love playing with my older supplies too!) And embossed using a sheet of blue metallic cardstock.

I stamped with Tuxedo Black Memento Ink, the gears, sentiment and several butterflies. Then I went to my copier. I selected one level darker and printed. I cut up a sheet of rainbow pattern Deco Foil and laid each square differently across my butterflies and gears.


I fussy cut both the original stamped butterflies and the foiled ones. I glues the stamped images flat to my card and then with foam tape adhered only the center of the foiled butterflies. Almost as if they are taking flight away from the old, as new brightly colored butterflies!

I added 2 of the foiled gears with foam tape as well.

I'm happy that you can see all the bright colors of foil in these photographs, but the original is so much better!


 If you are a fan of Steampunk, this or any of the original 2 sets are definitely a must buy!

The set, shown here, also has an amazing hot air balloon with rotating top that would be so much fun to create with! There are also some amazing gear dies too!

Find them all here: https://www.prickleypear.com/search.php?search_query=steampunk 

I hope I've inspired you to get into your crafty space and have a "happy accident" of your own! And if you do, be sure to share it with us on the Prickley Pear Pals Facebook page

If you'd like to see more of my work, you can find me at:

Blog: https://www.rockymtncraftia.com

Facebook: Tia Boswell

Instagram: #rockymtncraftia

Thanks for following! Now GO-GET-CRAFTY!

-Tia

Wednesday, September 6, 2023

September 6, 2023 - Thanks CLR286 Stamps and PPRS-D286 Dies


It's back to school time and whether your student has been in school for a few weeks now or just getting started doesn't matter. What matters is are you supply ready with Thank You cards?

Hi all! Tia here with you from RockyMtnCraftia.com. I always looked forward to crafting a variety of Thank You cards and gifts when the school year got started. Ready to thank my son's classroom teacher, and para-professional. Thank his specials teacher (music/art/computers/gym) at back to school night. Better yet, was when he asked me for a Thank You card for the crossing-guard!

There are so many people in our lives that we can not only be Thankful For, but can also take time to just Thank! And this is the stamp set to do it! 


My cards today are super fast and easy! Perfect for making several to have in your stash! I began with an A6 sized card (4.5x6.25) I used design paper with a school theme. Keeping with that theme I selected the dash-lined Thanks stamp. It reminded me of the tracing letters you do when learning to write.


I embossed white letters on black cardstock and used the word die to cut out. Then used the reverse colors on 'for all you do' and fussy cut it out. 

I popped both sentiments on foam tape, layering them slightly. 

Using an old Cricket cartridge called 'Back To School', I cut out several apples from toner paper and then foiled them. Count this cute card-done!


Here, I matted the card with black cardstock and adhered the design paper to it.

I used a 2 inch strip of black cardstock across the center. As before I embossed 'Thanks' in black on white cardstock and reversed the colors on 'for all you do' and adhered them the same way as before. 

I had an extra foiled apple and added it with foam tape too.

I told you these cards were fast, easy and super cute! 

Pick up the Thanks stamp set and coordinating die set today and get started on filling up your Thank You card stash!

Until next time, have fun and Go-Get-Crafty!
-Tia

Sunday, August 20, 2023

Sunday August 20, 2023-F.R.O.G. - Fully Rely On God CLR290 Stamp


 Welcome my Pear Pals! What a beautiful weekend it has been-I hope you've had good weather too and gotten to enjoy it! Tia here with you today from RockyMtnCraftia.com. No matter what season of life you are in I know you can be uplifted with the newest release stamp from Prickley Pear Stamps-F.R.O.G which stands for Fully Rely On GOD. This tiny but powerful stamp is just the perfect size for a bookmark! And I know many of my design teammates did just that! 

I took my bookmark one step further by giving it a home on a card! I didn't want to loose the bookmark and made my pocket from heavy duty acetate. 


I ran the acetate thru my die cutting machine with a stitched rectangular die larger than my bookmark and adhered it with red-double sided tape.

My card base is a 5.5in square and I used Simple Stories design paper.

Once my bookmark and it's holder where in place, it occurred to me that I had the perfect opportunity to make a 2ndary bookmark on the backside of the original!


This verse taken from 1Peter 5:7 is on the packaging of your F.R.O.G stamp. So I had wrote it on a lacey die cut scrap and adhered it to the backside of the double-sided design paper from Simple stories that was on the front of the card!

So now the card recipient can place either side in it's holder for inspiration. Take the bookmark with them in their favorite book. And still have a card that is shouting words of love and hope!


What a GREAT new release this month has been! And F.R.O.G is certainly my favorite!
Thanks for following along and have a wonderfully restful Sunday. 
Take some time for you and I hope it includes time to also be CRAFTY!
-Tia


Saturday, August 19, 2023

August 19, 2023- Doggone Good Friends CLR287 Stamps and PPRS-D287 Dies


Hello Pear Pals! Happy Saturday to you, Tia here from RockyMtnCraftia.com. Today's design team card is from the new release Doggone Good Friends. 

We all have that one friend, that "ride or die". I am fortunate enough to have mine within 5miles of me! We took plenty of road trips through college, including driving across the Royal Gorge, here in Colorado, with the top and doors off on a Jeep! So this stamp set made me think about how blessed I am to have her in my life and all the crazy road trips we have been on!

I wanted my doggie duo to have a little motion, so I tried my hand at a 'rocker-card'! 

Grab your circle die cuts or anything that you can draw & cut a circle from and then score it in half. And voila! You have a rocker card.

I cut a smaller circle out of acetate that I knew my doggies and sentiment would fit on and adhered the bottom half. I then covered it with a half circle of "map" design paper.

The trick to a rocker card it getting it to balance. With just the doggies-no worries. The moment I added the road sign, I knew I had to balance it. Hello-the cactus from our Brighter Days Ahead Clear Stamp Set CLR285. After coloring and adhering one cactus, I was still off and went for the other! Perfect-o!

This is such a cute set, with so many great sentiments and adjectives to choose from! Find it here in the Prickley Pear Store: Doggone Good Friends and don't forget to pick up the die set!

Thanks for checking in today and if you get the chance-call that friend and let them know how "doggone" blessed you are having them in your life!

And then-Go Get Crafty!
-Tia


Saturday, August 12, 2023

Saturday August 12th, Christmas with Spinach and Ramona CLR288 Stamps


Happy Saturday Pals! Tia here with you from RockyMtnCraftia.com  I hope your have been enjoying the new release of  Christmas with Spinach and Ramona 

I have been playing around with 'pop-out' cards lately and knew these special frogs needed a very special card!

Here is the front of the card:


I used my Cricket to cut the greeting and then foiled it for that holiday flair.

Here is a close up of the inside.


I had so much fun adding stickles to my snowy peaks. And glossy accents to the ornaments, mushrooms, candy canes and even the froggy eyes!

These froggy siblings are too cute to pass up! Make sure you head over to the store and add them to your cart now!

There's more froggy goodness to come this month! As well as some more new stamps to the Prickley Pear Family, so make sure you keep logging in here and on the Facebook page!

Thanks for following along and now it's your turn to Go Get Crafty!

-Tia


Saturday, July 29, 2023

July 29th, 2023 - You Are Loved Clear Stamp Set CLR282


Hi friends! I cannot believe we are almost to the end of July already! Time flies when you're having FUN! Tia here with you from RockyMtnCraftia.com. This is my last Christmas in July card, but I'll keep working on those holiday cards until the beginning of December. 

Yesterday my lovely teammate Teresa Cashion from Lollipots 'N' Polkadots, posted a beautiful card where she also featured the 'You Are Loved' stamp set. It's just such a beautiful and versatile set-truly a MUST HAVE!!! 

I am here showing another take with this clear stamp set. Today, I focused more on the sentiment that comes with the set because it is just so lovely. From the Book of Matthew 6:26- "Look at the birds of the air; they do not stow away in barns. Yet your Heavenly Father feeds them."

To keep the focus on the sentiment, I used a clever card sketch from Cards By Kendra. This is sketch #12 from Kendra's Card Challenge #10. (P.S. she has a new challenge going on now!)

I embossed the sentiment, so in person it's all shiny and raised! I fussy cut the "parent & child" birds from the set and placed them on both sides to draw you into the sentiment. And of course this is all added onto some beautiful holiday papers from my fav. Echo Park for an A2 sized card.

A clean and simple Christmas card made lickety-split! This is a great card idea for making multiples of cards to mail out!

Thanks so much for checking in with us today! I hope you've been inspired by my Christmas in July cards and the whole team! The best part is you can revisit the blog all year long for these cards! 

Now, time to get warmed up for August and shhhhhh-a NEW RELEASE?!?! Stay tuned!

And GO GET CRAFTY!

-Tia


Saturday, July 22, 2023

Saturday July 22nd- Christmas Trees-CLR009


 Happy Saturday Pear Pals! Tia here from RockyMtnCraftia.com. I can't believe I am writing to you from our boat sitting on a lake! And talking about Christmas! What a month this has been and the design team's cards are all so awesome! 

My card today featues a stamp classic! Christmas trees! I wanted to keep it clean and use as many of the stamps in the set as I could. When I started to look at inks I wasn't happy with the way they looked on the white paper. What to do, what to do? In steps my Watermark ink to the rescue!

I think the tone on tone really let the stamp images shine.

Additionally I used green glitter embossing powder for the sentiment. And then a gold gel pen to help one set of lights stand out.

Star Dust stickles was also used to outline the snowy hills. The card exceeded standard slimline size, but sometimes your card just has to be big!

The month's not over, there are more team cards to come! Thank you for spending some time with me today! 

 If your not already getting crafty today, then get to it! For me, I'll be fussy cutting and enjoying the breeze!

-Tia


Saturday, July 1, 2023

July 1st, 2023 You Are Loved CLR282


Ho,Ho,Ho-Merry Christmas in JULY! We, the design team here at Prickley Pear Stamps are HAPPY to present you with Christmas In July! A month long tribute to inspire and motivate you. Weather you decide to actually start your holiday cards now or just begin gathering some ideas is of course up to you! We're just excited to show you all that you can do with Prickley Pear Rubber Stamps and Dies to create a season filled with love, joy and beauty!

Tia here from RockyMtnCraftia.com, and I'm starting the fabulous month of July off with the 'You Are Loved' clear stamp set.

This gorgeous set with three sentiments, four individual birds and a beautiful large image featuring three birds decorating a Christmas tree. I wanted to try my hand at coloring up that amazing tree. Once done the challenge was in the card layout. 

There is just so much action in this one image, I decided to capture it all-individually! First, I will tell you, I did not color this image three times! I actually colored it once-and really, really took my time doing so! I then color copied it onto my good Hammermill Cardstock (Premium color copy-80lbs). With copies, I could crop and cut to fit into my filmstrip die.

              Here is a close-up from left to right of my slim line card.


   Here I embossed the sentiment on a tag. The squiggly outline was hand drawn by me with a gold gel pen.


This month is going to be so much FUN! Make sure you are back everyday to join us! If you decide to join us and create your own Prickley Pear Christmas In July cards, make sure you post it on the group Facebook page so we can get inspired from you too! 

                        Join us today: https://www.facebook.com/groups/PrickleyPearPals

Thank you so much for following along and I'll be back with another Christmas In July idea for you soon! Until then- GO GET CRAFTY!

    -Tia


Wednesday, June 28, 2023

June 28th, 2023 Dainty Dragonflies CLR064 and Dainty Dragonflies Die Set PPRS-D064


Welcome Friends! Tia here with you from RockyMtnCraftia.com. Summer is officially underway and one of my favorite parts of summer as a kid was catching lightening bugs or for some of you Fireflies. So it occurred to me to take the gorgeous Dainty Dragonflies set and create a dreamy nightscape with them.

I started with an A2 sized card base and created my scene on it. I inked the panel with Distress Ink in Faded Jeans, Stormy Sky, Dusty Concord, Victorian Velvet and Spun Sugar. I used white acrylic paint to flick 'stars' across the sky. I then die cut an A2 sized black panel to create a hexagon window and adhered it to my scene. Now, you could draw in the night-plants before, but I chose to do that after my panel was adhered down. To draw the plants I simply used a broad tipped black sharpie.

Now, more of those gorgeous dragonflies! Did I mention that there are 9 dragonflies in the set and in 3 different sizes, so the die set will cut all 9! Brilliant! There are also 2 sets of antennae and two little ladybugs! Seriously, this set is so cute!


After inking in my dragonflies, I layered them with a coat of Wink-a-Stella. Lastly, I die cut the word 'dream' several times with black cardstock. Then glue stacked them together for dimension. Next, I pressed the top layer into VersaMark watermark ink and applied WOW-Metallic Silver Sparkle embossing powder. Now my sentiment outsparkles the dragonflies!

I hope you are having a wonderful summer! Remember to take some time and dream-dream about all the fabulous creations you can make when it's your time to GO GET CRAFTY!

Thanks for following along-see you for Christmas in July!!!

-Tia

Saturday, June 17, 2023

June 17th, 2023 Dainty Dragonflies CLR064 & Wildflowers CLR249


 Happy Saturday friends! Tia here from RockyMtnCraftia.com. Today I'm sharing a great 'all purpose' card for your stash. I used the Dainty Dragonflies and Wildflowers sets to achieve this look.

I love how these two sets come together seamlessly for a natural looking scene. Combined with a simple sentiment this card could be used for any number of situations.


I started with an A6 card base (6.25x4.50) and a cut piece of cardstock at (4.25x5.5) that I used for my scene. Using Distress Inks in Chipped Sapphire and Tumbled Glass I created the background sky. 

Next I stamped the Wildflowers low on my card and used a wet wipe to clear ink away from the butterflies that are are the stamp.

Using my Misti, I selected several of the Dainty Dragonflies to create a circular flow around the card.

It's important to use the right supplies for the right project. And although I am a COPIC girl, this scene is just too dainty for them! This was the perfect project for my Staedtler Triplus Fineliner pens.


Lastly I stamped a sentiment from my collection and mounted the panel with foam tape on the card base. 

There's still one day left in the Prickley Pear Moving Sale-head to the store and pick up these sweet Dainty Dragonflies and pair them with any of the gorgeous floral stamps in the Prickley Pear Store! 

Thanks for following along! Until next time-Go Get Crafty!

-Tia

Wednesday, June 14, 2023

Wednesday June 14th, 2023 Ham Camper CLR068 & Die PPRS-D068


Woot Woo Wednesday Campers! We are one week away from the official start of Summer! Crafty Camp counselor Tia here from RockyMtnCraftia.com ready to create more memories with the Ham Camper stamp and die set!

I used design paper from Carta Bella's Botanical Garden pack and coordinated my colors from there. I don't use stencils a lot, but always good to create outside of your comfort zone.

I selected coordinating ink colors (I used inks from Pink Fresh Studios) and a stencil from The Crafters Workshop (Barberry Buds) to create a fun fresh background. 

For quick card design, I utilized one of Kendra's Card Challenge sketches (#10-sketch 5). I love Prickley Pear Stamps Scallop Circle Nesting - Die Set PPRS-D041, and utilized it for the base of the Ham Camper.

I love that with the Ham Camper stamp set, you can mix and match design elements and make dozens of different camper looks! I achieved the diamond plate metal look by using a silver metallic gel pen on the hatch marks. The flowers and awning I popped up with foam tape, along with a sentiment from the stamp set.

Thanks for following along friends! Get over to the Prickley Pear store and grab those Summer goodies and then get outside and 

Go-Get-Crafty!
-Tia

Friday, June 2, 2023

Friday June 2, 20023 Ham Camper CLR068 & Die PPRS-D068


Hello Friends! Hello lazy days of Summer! Tia here from RockyMtnCraftia.com, sharing with you an iconic image of Summer-the Ham Camper!

Not too long ago I had a great laugh with friends over this name-"Ham Camper". It's named so because of the shape-it's shaped like a hunk-a-ham! And hysterics ensued! Crafty friends really are the BEST!

My card layout is from Kendra's Card Challenge #10. And this is sketch #5. Challenge 10 is wrapping up June 30th, so if you want in on the fun and PRIZES (Prickley Pear Stamps is a Prize Sponsor!) head over and check it out! Cards By Kendra-Kendra's Card Challenges.

The card is A2 sized. I used an embossing folder for the cloud background and design paper from Echo Park. I stamped and die cut my Ham Camper after coloring with Copics. The used Prickley Pear's Scallop Circle Nesting - Die Set PPRS-D041 for the yellow background shape to adhere the camper to. And a big Hello die to welcome all the fun of Summer!

Thanks for stopping in! I hope you have some fun Summer travels planned! Stay safe and when you can-
Go-Get-Crafty!
-Tia

Monday, May 29, 2023

May 29, 2023 Birthday Banners-CLR062D & Build A Cupcake-CLR059


Hello Friends! Tia here from RockyMtnCraftia.com back with more Birthday Banner fun! I really liked the look of my no-line coloring on the last Birthday Banner card I made, so I came back with it again. This time I paired the banners with the yummy Build A Cupcake set!

What I LOVE most about both of these sets is FIRST-they both have DIES! Save yourself some time and frustration and both of these matching dies!!! SECOND-there are additional sets to match those dies! The Banners set comes in Christmas, Halloween, Valentine's and Easter. The Build A Cupcake also has Christmas, Valentines and Fall themed cupcake sets that match the SAME die! This is how you stretch you collection!

Okay, let's get into today's card. I began with an A2 sized card base. I selected birthday paper from my stash. I created a bold frame using Onyx cardstock and a scalloped die. 

I selected the birthday banners-balloons and cupcakes and decided to stamp my sentiment (from the banner set) on a banner. Once again, I stamped everything with Hero Arts Contour Ink which is designed for no-line coloring. 


After building my cupcake, these are the COPIC colors I selected to color everything in.

COPIC SELECTION:
Cupcake Frosting: WO; E50; YR30 and E57; E29
                Wrapper: BG15; BG07;Y13; YR14
Yellow:Y13; Y15; Y17
Orange:YR14; YR68
Red: R35; R46; R37

Fine Lines with: Staedtler Triplus Fineliner: Bright Yellow; Orange, Red, Teal, Light Gray

Lastly, I adhered the base of the banners to the card front, while popping the ends with foam tape. I also adhered the cupcake with foam tape on top of the edges. 

Another fun and fast card that will really show your excitement to celebrate! So until you do...
Go-Get-Crafty!
-Tia


Wednesday, May 24, 2023

Wednesday May 24, 2023 Birthday Banners-CLR062D + Banner Die Set PPRS-D062


Welcome Friends, it's a Woot-Woo Wednesday! And to celebrate, I'm pulling out the banners! Hi all, Tia here from RockyMtnCraftia.com. Today I've got a birthday card that really shows the recipient just how excited you are for them. And it's all thanks to the Birthday Banners Set! Nothing shouts louder (in a card) your excitement then banners rolling out of an envelope with balloons and confetti. So let's get started!

I started with paper. In my stash I found this bright, playful polka-dot pattern paper. I like that the colors were bright, but not primary colors. I matched gorgeous orchid colored cardstock for the base and envelope. The background of the design paper was off white, so I decided to cut my banners out of Very Vanilla cardstock. Next came COPIC selection. Again, I matched COPICS with the colors in my design paper.

COPIC COLORS

Pink: RV13;RV25

Purple:V12;V04;V06

Orange: YR16;YR04

Green:YG03; YG25

Blue: B00; B12; B21

For the very fine lines I used Staedtler Triplus Fineliners in: Lt. Green, Mid-Green; Mid-Pink; Plum; Lilac and Warm Gray.

I selected the banners I wanted from the set and stamped them with Contour Ink from Hero Arts. I really wanted the colors to pop and went for a no-line coloring technique. Contour Ink is a hybrid ink intended for no-line coloring.

I used the Banners Die Set from Prickley Pear Stamps to cut out my banners and arrange them in my mini-envelope. The envelope in a gift set, I kept it and opened it flat to create a template from. There are lots of  YouTube videos on how to create envelopes, as well as dies on the market.

I then fit the banners into the envelope (cutting the ends to help them fit) and popped them up with foam tape. 

Since the Banner stamp already had the word "Happy", I die cut the word birthday from black cardstock. I decided that looked bolder than I wanted and added another layer cut from Melon Mambo on top-so now it looked shadowed. I deckle cut a background boarder and attached it all to an A2 sized card base.

I love the energy of this card and hope you like it too! The Birthday Banners set has such great energy and this card idea would be easy to alter for Anniversary, Wedding/Baby Shower, Retirement/Graduation etc.! And once you get the Banners Die Set, there are several other Banner stamp sets in the store! Check them all out here: Banner Sets.

As always, I'd love to see what you're working on-so come join us over on the Facebook group at: https://www.facebook.com/groups/PrickleyPearPals

Thanks for following along and until next my friends-

Go-Get-Crafty!

-Tia


Saturday, May 20, 2023

May 20, 2023 Build A Bird-2 CLR003A


 Happy Saturday Friends! Tia here from RockyMtnCraftia.com, popping in today. I'm back featuring another card idea with the Build-A-Bird-2 set. I've got a whole new layout and another of the bird stamps on this card!

It's been nice taking a break from my craft studio remodel! While moving ALL of my crafty goodness in and out of the room, I've been re-familiarized with some papers I didn't remember! Including this gorgeous foiled diamond paper. And it was the inspiration for today's spinner card! WOW! I hadn't made one of these cards in awhile.

I started by adhering my background paper to my card front (an A2 sized card-4.25 x 5.50). I used 2 hexagon nesting dies to create the pink design paper "frame". Then using the inside die, I opened up my card and laid it out in my die cutting machine, so it would cut the hexagon shape through the card front. You can use that discarded piece of paper inside you card, but I chose to use the pink design paper.


For our bird stamp, I used Angel Pink Memento ink and embossed with clear powder. I used COPICS to fill in the open areas with (YG03; RV08 & RV09) and die cut. I die cut an additional piece that I embossed for the backside of the bird when it spins.

On the inside of the card I laid my bird front and taped thread from the top and bottom of the card and taped it closely to the window. I used a 2nd "frame" glued down to secure the thread. Lastly, I glued to backside of the bird, creating a "sandwich" with the thread. When your ready to send, simply spin the image and when the recipient opens the card the image-spins!


I used sentiments from the stamp set for my message and die cut some foliage under the frame for added texture and dimension. 

The Build A Bird 2 Stamp set is so beautiful and versatile. It's been a pleasure creating this set of card and sharing them with you. 

Thanks again for checking in and following along! I hope you're inspired to spend some time in your crafty space and try your hand at a spinner card! If you do, come share it on the Prickley Pear Facebook Group page and tag me! 

Now Go Get Crafty!
-Tia


Thursday, May 18, 2023

May 18, 2023 Build A Bird-2 CLR003A


 Hello Friends! Tia here from RockyMtnCraftia.com. I've been gone for a bit (busy remodeling the design studio!) We've had SO much rain over the last week that I just had to make a card to cheer myself up! 

I created a card last month using one of the incredible sketches from Kendra's Card Challenge #10 and the Build-A-Bird-2 stamp set from the Prickley Pear Stamp store. It was so much fun, that I decided to do it again, and flip the card-the way it was sketched!

I embossed my bird with primary red-WOW embossing powder. Using some COPICS to color the bird and match with the wood design paper background. I used one of fellow teammate- Kim Kreates, loopy bows under the bird for some texture. Then decided to stamp my sentiment on a leftover piece of scrap paper and cut it out freehand!

I kept my design vertical as sketch #8 was originally set up as. But, as a reminder-here's the card I did last month where I flipped it-vertically. Love the versatility of these sketches and all the different bird stamps in this set!


I hope that you have a beautiful remainder of your day and thank you so much for stopping by and following along with me! Until next time...

Go-Get-Crafty!

-Tia