Showing posts with label Cardinals clear stamp set. Show all posts

Friday, November 3, 2023

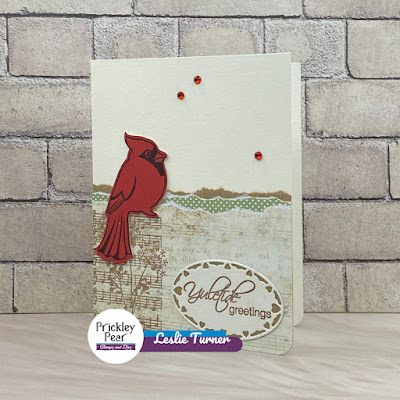
November 3, 2023, Cardinals CLR005 Stamps, Cardinals 2 CLR005A Stamps and Cardinal PPRS-D005 Die

Hey everybody, happy Friday! I'm still working on Christmas projects which I do all year long. How about you... have you started on them, are you plugging away, or are you finished? Leslie here, sharing an inspiration project featuring the absolutely gorgeous Cardinals and Cardinals 2 stamp sets along with the coordinating Cardinal die and the Heart Oval Insert die. This CAS-ish vintage card is a super simple design that would be so easy to mass produce for everybody on your Christmas list.


I cut a standard A2 size side-folding card base from ivory cardstock along with layering panels from kraft paper and two coordinating patterned papers. I tore the top edge of the three layering panels and adhered them to the card base. I stamped the floral music image from the Cardinals stamp set on the left edge and the sentiment from the Cardinals 2 stamp set on a scrap piece of ivory cardstock, both in brown ink, and cut the sentiment with the Heart Oval Insert die. I traced around the outside edge of the oval die cut with a pencil onto a scrap piece of kraft paper, hand-cut it just inside the tracing line, and adhered it behind the die cut. I stamped the cardinal in black ink on red cardstock and cut it with the coordinating Cardinal die. I die cut two additional cardinals and adhered them on top of one another for a little dimension, and then adhered them to the card front. The finishing touch was adding several small red gemstones.


Prickley Pear Stamps products used:
Cardinals stamp set 
Cardinals 2 stamp set
Cardinal die
Heart Oval Insert die

Thanks so much for stopping by today - we'll see you again soon!

Scrappy hugs,
Leslie
Blog / Facebook / Instagram / Pinterest / Twitter

Tuesday, January 19, 2021

How to create an awesome diorama card!

Hello Prickley Pear Stamp fans! Leslie here, from Love To Scrap 2, sharing another project using the gorgeous Cardinals stamp set with coordinating Cardinal die! I posted a stand-alone Winter home decor project yesterday morning (that post is HERE) and promised to come back with a similar but slightly different diorama project using that same stamp set and die plus one additional die (the Pine Branch die set), so here I am with a diorama card that folds flat for mailing! I also used the Cardinals 2 and Fall Leaves stamp sets, AND I have cutting and scoring instructions for you to make your own diorama card, so let's get started!


If you are more of a visual kind of person (like I am), here is a photo of the template showing the cutting dimensions, scoring and placement of the aperture. The vertical lines are the score lines, and I cut an oval aperture but you can use whatever shape you want.


To create the base, cut an 8-1/2" x 5-1/2" piece of 110# cardstock and score at 1/2", 1-1/4", 5-1/2" and 6-1/4" on the long side. Keeping the cardstock in the orientation shown in the photo above, cut an aperture on the right side. 

Cut a 5" x 5-1/2" piece of cardstock for the front flap. 

Fold all the score lines and adhere the 1/2" flap to the inside to form a box. Use a bone folder if necessary to get good creases and to ensure that the box folds flat. Adhere the front flap to the left side of the box. When the front flap is closed, the box will shift to the right and fold flat. 


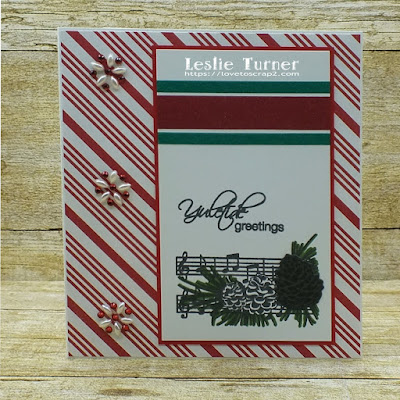
Now it's time to decorate the front flap and create the inside element that the recipient will see when they open the card! I cut a red and white striped panel and adhered it to the front. I used the music/pine bough and sentiment stamps from the Cardinals 2 stamp set on a smaller panel which I embellished with washi tape and layered on red cardstock. I outlined the pine fronds with a green alcohol marker and then adhered a stamped and die cut pine cone (which I mention below) and added some snowflake bling on the left of the panel. 


For the inside element, I die cut ten pine branches from green cardstock and four pine cones from brown cardstock using the Pine Branch die set. I used the pine cone stamp from the Fall Leaves stamp set to make the pine cones look a little more realistic, and adhered one to the front panel which I mentioned above. I arranged the pine branches, the remaining three stamped and die cut pine cones and three winter berries (created with a 1/2" circle punch) on a 1-1/4" punched circle to keep everything contained and easier to adhere to the inside. You can omit this step and adhere the pine branches directly to the inside if you want. I stamped the cardinal from the Cardinals 2 stamp set and die cut it with the Cardinal die, then layered three additional cardinal die cuts behind the stamped one for a little dimension, and adhered it to the pine branches. I used a little grit paste on a paint brush to create faux snow on the pine branches, pine cones and winter berries and let it dry for about 15 minutes or so, then adhered the element inside the box to be viewed from inside the aperture. The final touch was stamping, trimming and layering the sentiment, and adhering to the inside across the top left of the aperture at an angle.


And here's a photo showing the card folded flat for mailing. The diorama box is 4-1/4" x 5-1/2" but the folded flat dimension is 5" x 5-1/2". 


Prickley Pear Stamps products used:
Cardinals and Cardinals 2 stamp sets
Cardinal die
Pine Branch die set
Fall Leaves stamp set

Diorama cards are so fun to make and really pack a punch when opened by the recipient! These stamp sets and dies are 'must-haves' for your crafty stash so be sure to check them out! 

Thanks so much for stopping by today - we'll see you next time!

Scrappy hugs,
Leslie

Monday, January 18, 2021

How to create simple and elegant Winter home decor!

Hello Prickley Pear Stamps fans! Leslie here from Love To Scrap 2 sharing a pretty Winter Cardinal Diorama featuring a layered stamped and die cut cardinal! I created this several weeks ago and even though Christmas has passed, I thought it would be fun to share it here because the star of this show was stamped with the cardinal outline stamp in the Cardinals stamp set on red cardstock and cut with the Cardinal die. He sure is gorgeous! ;)


I started by assembling the diorama box and covering it (along with the large snowflake) with two coats of white gesso. When they were dry, I sprayed a blue shimmer mist in short spurts, added blue glitter and then white glitter, and applied a fixative so the glitter wouldn't fall off. I then sprayed tarnished silver shimmer mist in a few spots. I arranged the pine bough, pine cone and winter berry with a couple pearl sprays and adhered them to the inside of the box with the hot glue gun. I added some distress grit paste on the elements to resemble snow.

I stamped the cardinal on red cardstock, cut it with the coordinating die and layered five more cardinal die cuts behind it for strength and dimension, and then adhered it to the front of the pine bough. I tied a red and green plaid bow and adhered it to the bottom right corner. I added iridescent gemstones to the snowflake and adhered it to the upper left corner.

I stamped the sentiment (from the same stamp set) on a piece of scrap white cardstock, trimmed it, rolled one end and flagged the other end, and adhered it across the snowflake. I used one of the snowflake stamps in the stamp set and randomly stamped snowflakes on the front in white StazOn ink. The finishing touch was the addition of two more iridescent gemstones in the top right and lower left corners.


Prickley Pear Stamps products used:
Cardinals stamp set
Cardinal die

Despite it's complex look, this diorama really was quite simple to make and
I hope you enjoyed seeing it! This stamp set and die would make awesome additions to your crafty stash, so be sure to check them out! Stay tuned for another (kind of similar but a tad different) diorama project using this same stamp set and die plus an additional die! Have I peaked your interest? I hope so! ;) 

Thanks so much for stopping by today - we'll see you next time!

Scrappy hugs,
Leslie