Saturday, April 11, 2015

Graphic Flower Three Ways....


You may have see my GG0209 Graphic Flower card a few weeks ago.  This image is so fun to play with.  I was stamping with Heidi the other day and she colored her flower in this style with Copic markers, so I decided it was CASE-worthy!

You saw this card the other day...but I improved on it a bit by glittering the hearts and tangling on the ladybug from the D011 Dragonfly die.  How stinking cute did that turn out?!

This card uses Heidi's color combination.  My challenge to you....sit down and take one stamp and create 3 or more cards that look totally different!  So fun!

~michelle

Friday, April 10, 2015

Happy Friday!

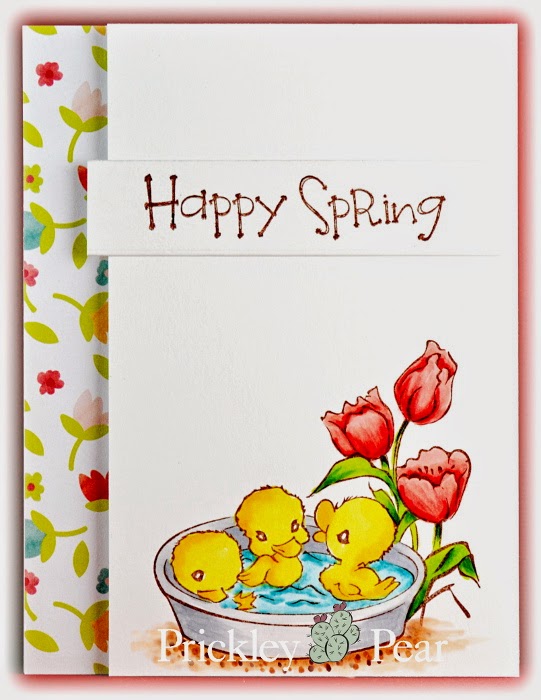
I have a few cards to share with you today from the latest release.  This card features HH0175 Pond of Ducklings and CLR033C Flourished Oval Sentiments set.  I colored the image with Copic markers and then used the Out Of The Box Technique to cut away much of the white space around the image so more of the embossed background could show.

I used basically the same layout and technique on this card, but changing the image and the papers up gives it a totally different feel.  This card features the HH0176 Singing Bluebirds and DD0226 A Little Bird Stacked image.

Hope you had a great week!
~michelle

Saturday, March 28, 2015

Rita's Inlaid Die Cut Tutorial


Today I want to share a tutorial for inlaid die cuts.   If you mail a lot of cards, this can come in handy because it will decrease the bulk of your card while also creating a really cool look!  You'll need at least one die, but you can layer multiples if you like.

Supplies:
Die Cut
Die Cutting Machine
Adhesive
Card stock
Stamps/Embellishments to finish the card


For this technique, you need to have an idea of what you want your finished card to look like so that you cut your paper correctly.  I wanted to recreate a card I'd made before, so that part was quick for me.  When you are starting from scratch, it might take a little longer.  The first step here was to cut the die cut from the colored card stock and then cut my base and layer.  I used watercolor paper for my second layer; with intricate dies like this beautiful Circular Pendant, the heavier paper seems to make this technique easier. 


Now you need to decide where you want your die cut on the second layer and lay down the die.  I used a bit of Post-It tape to keep it where I wanted it and then ran it through my Big Shot.


At this point I have my base, the watercolor paper layer with the die cut out, and the extra die cut that I did in the first step.   I also have the little pieces left from cutting the die from the watercolor paper.  You want to save those as you'll use them to fill back in.


There are a lot of options for this step, but for me the easiest way is to cover a piece of copy paper with some adhesive and add it behind the watercolor paper layer.  I then added the purple die cut and the little pieces of watercolor paper.


And here's the result.  The die cut is completely inlaid in the watercolor paper!   Less bulk, less weight and kind of a wow! 


I stamped and cut out one of the cute circles from Circle Sets-Sentiments and added a sentiment from that same set.  A bit of ribbon and I have a cute, simple card that I can quickly mail off to a friend. 

I hope you enjoyed the tutorial and I hope you'll give it a try.  

Monday, March 2, 2015

Inspiration, NEW BLOG HOP WINNER and more!

Happy Monday!  Sorry I'm a bit late with the post this morning.  Fresh back off of vacation, and you know how catching up can be!!

First off, I have a winner from last Monday's post, thanks to those who commented sharing their favorite images from this release!!    Winning one clear stamp set from this release is:

Jennifer {jennifer-g}February 25, 2015 at 2:38 PM
Congrats Sherry. Wow, just one favorite is a tall order! I'd have to go with the Boy with Plane (singing bluebirds close second!). Great inspiration pieces again this week!  

Let me know which set you would like and send me your info to bnnmpearson at charter dot net.

And sadly, Sherry never claimed the Blog Hop prize and I have no way of contacting her, so we also have a new Blog Hop Grand Prize Winner!!    Please contact me by email with your info as well!
Blogger Monika Reeck said...
Uih cute Image
and great coloring too
nice DP and all the STAR here
really great boy or masculine card
I ADORE THIS
February 15, 2015 at 4:13 PM
Delete

Monday, February 23, 2015

Inspiration, a Winner and a Little Something More!

Happy Monday!  We have another great pile of inspiration to share with you today!!  ....AND our Blog Hop Winner...and a little something more!
Designer Angela Bode using HH0175 Pond of Ducklings,  DD0231 Happy Spring 3. 


Designer Rita Wright using: DD0231 Happy Spring 3, HH0175 Pond of Ducklings

Our blog hop winner is:

Gorgeous card love the blue!

Sherry, please pop me an email at bnnmpearson at charter dot net with your name and address and I will get your goodies to you!!

Thanks for all of your lovely comments ladies, it means a lot to the design team, we love to hear from you! So, to extend the fun a bit longer, keep the comments coming...this week tell us what your favorite image is from this release and I will send one lucky commenter one of the new clear sets!    Have a GREAT week!!