Saturday, July 26, 2014

Zenetangle-Inspired Ruffled Heart Sampler

Well, I promised you part two of my Zentangle Tutorial...and basically all I did here was use the same image and created TWELVE more hearts that are all using the same GG0127 Ruffle Heart stamp.

I made them all up into cards similar to this one with various verses.  This pattern gives a much lighter feel than the darker more bold pattern I used in the original tutorial post.  EE0187 Simple Moments.

Here is another card featuring a different stamp that I tangled on!  KK0038 Witch on Pumpkin and EE0141 Happy Halloween 2.  I tangled a border around my image on this card as well.

I was having quite the fun checking out the images I could tangle on!  This one features JJ0051 Kitty in Balloon and CLR036 Stocking Clear Set.  On this one I used the pattern on the balloon and simply tangled on the remaining portion instead of coloring it!

If tangling might be your thing, I hope I have inspired you!  If not, maybe you can be inspired by the images themselves!  Thanks for taking a peek!
~michelle

Friday, July 25, 2014

Tracy's Gift Box Tutorial


This is my tutorial for a gift box, and here are the Prickley Pear Products I used to make it with:


CLR023 Mini Butterflies clear set, D044 Heart Oval Insert Die, D045 Flourish Die, CLR013C Scalloped Circle and Oval 4 Floral clear set.

I used two pieces of A4 card, and cut to 21cm square, for the lid use a score board and score 4cm in from the edge all the way round, as below:-


Then for the base slice a slither of two sides so the base fits in the lid, now score as you did with the lid 4cm in from the edge.


Now cut the corners as below, then using a bone folder fold all the scored lines.


Use a wet glue to glue each corner then hold together with paperclips on both the lid and base. Then set the boxes to one side to dry while you make the embellishments.


Next I stamped out some flowers using CLR023 Mini Butterfly stamp set, I coloured them with markers then cut them out, I layered the two sizes of flowers, added pearls to the centre and glittered the edges of the petals.  For the rest of the embellishments I cut a flourish using D045.  and a butterfly from the stamp set.


I stamped my sentiment from the CLR013c stamp set in the centre of the heart oval insert die and layered up.  Now arrange all the embellishments on to the lid of your gift box.  I added a fancy braid around the lid.


And thats my gift box.
Thank you for looking
Happy crafting
Tracy x

Thursday, July 24, 2014

Guest Designer Melissa ~ Thank You!

Hi everyone!  It's Melissa, back for another guest post!  August arrives next week and I've been busy as ever making plans for a last minute vacation and events as summer break begins to wind down.  I hope your summer has been a good one!

For today's post, I wanted to put the spotlight on Prickley Pear's wonderful sentiment stamps!


Using a stencil, I sprayed the pattern on a panel of white cardstock using navy and green shimmer inks.  I then stamped the sentiment and rounded two of the panel's corners before popping it up on the card base with foam dots.

This sentiment is called Thank You Would Suffice and can be found in the Prickley Pear online store along with lots of other wonderful sentiments in a variety of fonts!  Don't forget that the clear stamp sets also contain great sentiments that can be used over and over again with different images from other sets or stand alone rubber stamps!

Do you have a favorite sentiment stamp these days?

Until next time,
Melissa from Oh, Smudge!

Wednesday, July 23, 2014

Zentangle Inspired Tutorial with Michelle

Today I am sharing a tutorial for Prickley Pear Rubber Stamps.  As you know...I've been dabbling with Zentangle lately, and today I'm going to show you how to take the GG0127 Ruffle Heart image and make it a little special by adding a tangle pattern to it. 

I chose the pattern Strimonds to add to the open area of the heart.  Here you can see it on the pattern sample.  Note how it looks different as I have changed the orientation.  The options are endless!

I have found that tangling sometimes looks harder than it is.  Here I have broken down the steps I took to create this patttern.

1.  Stamp your image, and in this case I cut it out.
2.  Add a grid pattern to your heart with a 01 Micron pen.  I could have done it horizontally and vertically, but for this image I slanted it a bit.  You can see that in every one of these the orientation is a bit different, but that is the beauty of it...there is no wrong!
3.  Add some ovals in the squares as shown.  They will look like long rows of sausage links separated by one blank square!
4.  Next add the ovals in the opposite directions making the lattice pattern.
5.  Next I colored the squares around my vertical ovals in solid black.
6.  Next I added curved lines around the remaining ovals.  This creates a really interesting pattern!
7.  I added some tiny feathery lines around the heart's ruffle for the image on the card.

Here you can see the progression from stamped image to finished card.  Sentiment is
EE0187 Simple Moments.

Have you tried this fun art form with your stamping yet?  I have found it opens up a whole new world with my stamps!  Watch for Part 2 of my tutorial which will show what this image looks like with different patterns in it! 

Thanks so much for taking a peek today!  I'd love to hear what you think!
~michelle~ Inspiration Blooms

Thursday, July 17, 2014

Hello!

Hello, everyone!  It's Melissa here again as a guest designer!  I hope your month is going well because it's half way done, believe it or not!  The first day of school will soon be here and, if you're anything like me, you're feeling like summer has just begun!

Time is flying and so are the dragonflies...


This particular dragonfly is from the Dragonflies Clear Stamp Set and there are coordinating dies to go with it!

Complementing Die Set - PPRS-D021 Dragonfly (Not Included)

The simple sentiment is one of my most used ones and it is from the Hibiscus 2 Clear Stamp Set, another favorite of mine!

Feeling inspired to make something with a black and white color scheme, I masked a strip of black before popping up the dragonfly and adding three gold sequins for a little shine & a subtle pop of color.  I love having simple cards like this around to stick in the mail when inspiration strikes!  Everyone needs a little snail mail hello every now and then!

Until next week, enjoy your summer!
Melissa from Oh, Smudge!

Tuesday, July 15, 2014

Watercolor Tutorial with Distress Inks

Barb here to share an easy way to color your favorite Prickley Pear stamped images using Distress markers/ink pads.  Water coloring is very popular right now in cardmaking so I'm jumpin on in today!  So let's get started!


Supplies:  StazOn ink, watercolor paper (140lb), water brush, 
Distress Markers and or ink pads, kraft sheet, paper towels.


First grab your watercolor paper and stamp image with StazOn ink. 
It is important to use this ink so your image does not run when
you add water.  I used Strathmore 140lb weight watercolor paper
I purchased at Hobby Lobby.


To begin I started with the leaves using Peeled Paint marker I
just squiggled down the center. You don't need to color the
leaves completely.  Take your water brush and work from the color out.
You can keep adding water til you like the way it looks.  
There's no right or wrong to this method. Be artistic!


Here's what it looks like when you finish leaves. 


Next do the centers of flowers. I used black soot for part, use 
waterbrush to fade it out brushing away from black ink.


Now sqiggle in a little vintage photo ink and blend away
toward the edge with water brush.


Now for the petals:  Using wild honey marker add right outside
the center of flower all the way around, use water brush to blend
out toward tips of leaves. I went back and added a little Mustard seed 
to tips of flowers and blended with water brush. Easy!
It may take a little practice but I like the effect!


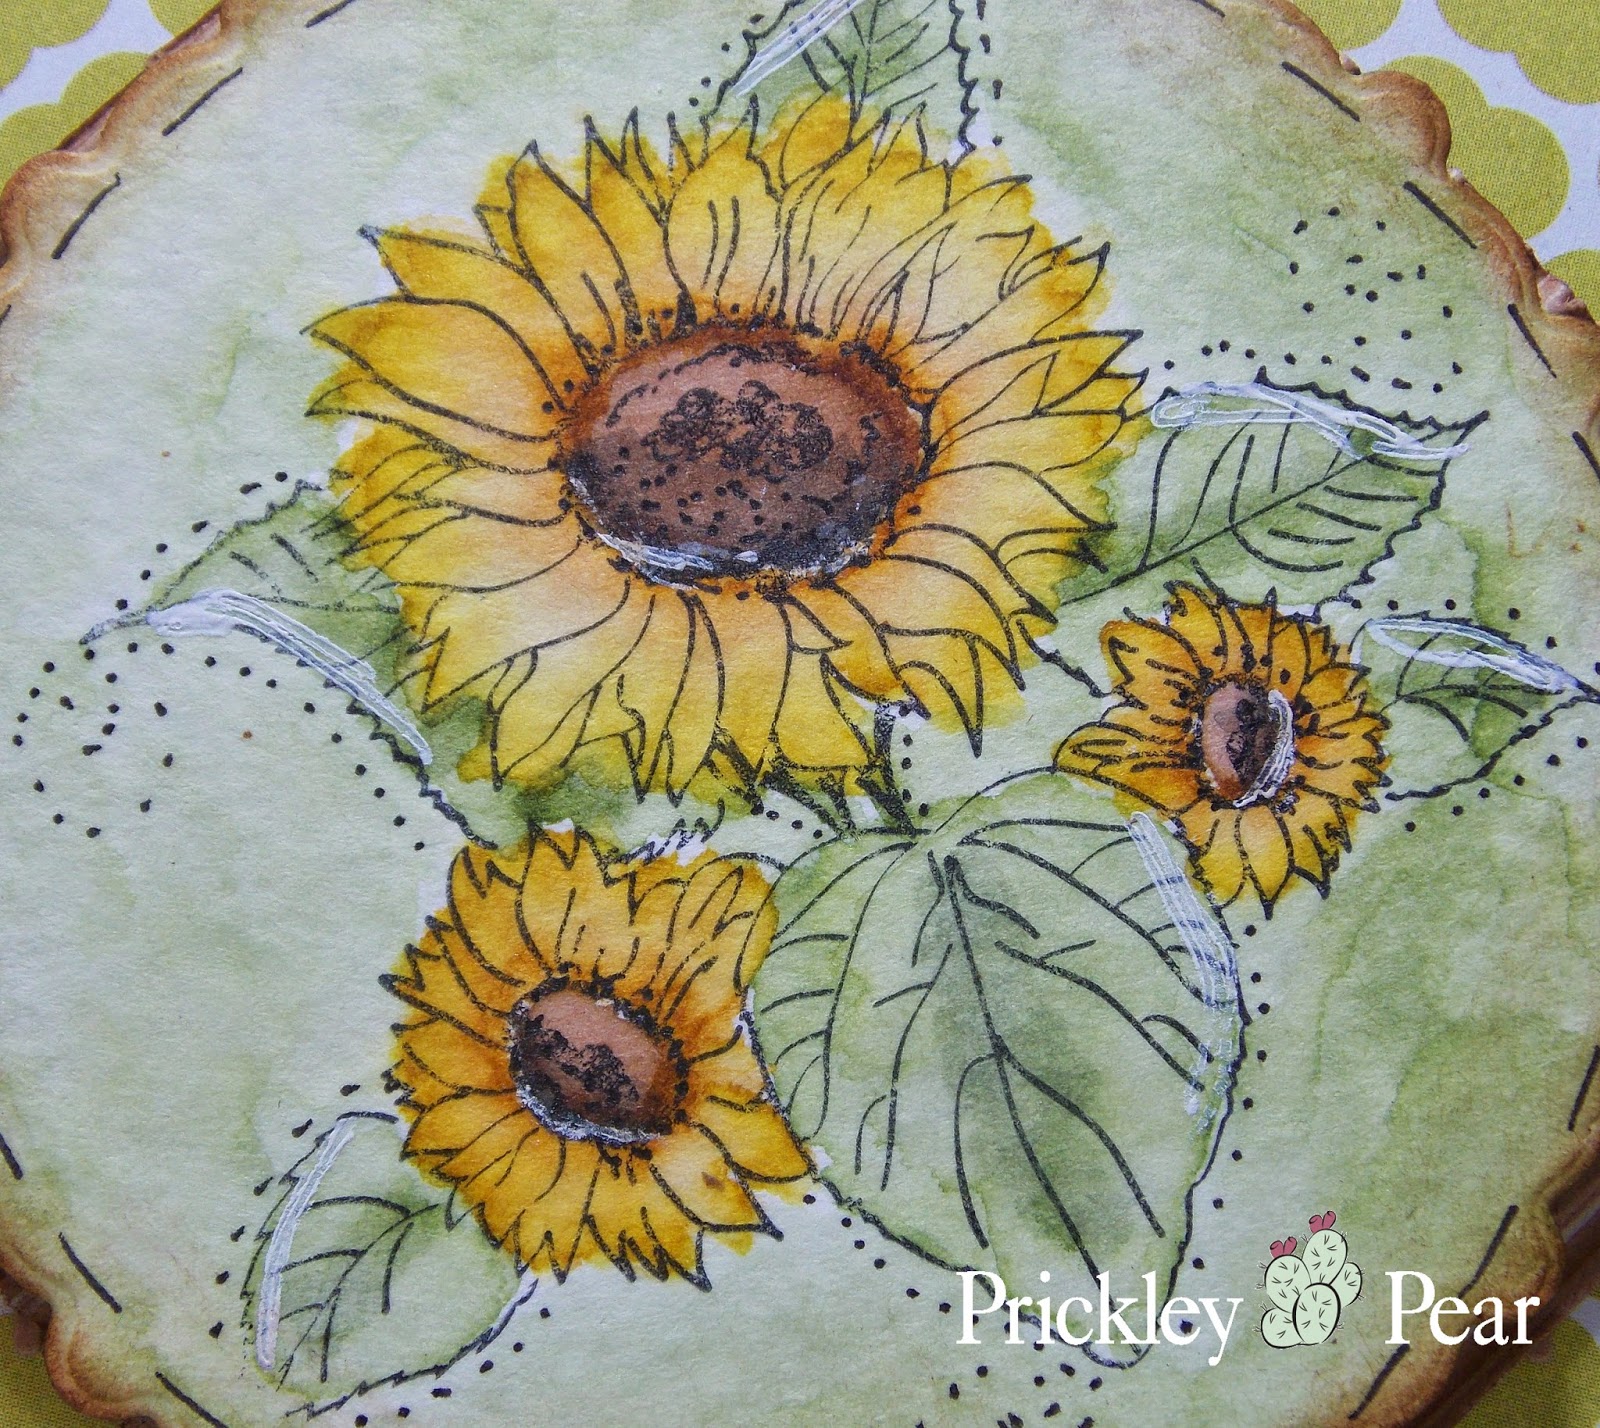
Here's my completed card. I decided to add green to the 
background. The white was a little stark.  I also added a little
white highlighting with a gel pen and some dots and faux 
stitching with a Copic 0.3 multliner.
The tag is watercolored as well with mustard seed ink.
Prickley Stamps used:

A closer look

I hope you'll give water coloring your stamped images
a try!  It's quite fun!