Tuesday, December 25, 2012

Repeat Stamp Image Tutorial


Repeat Stamp Image Tutorial

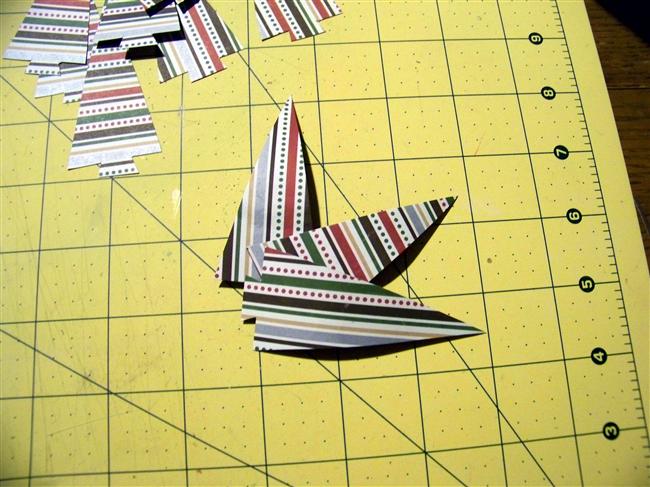
I was looking at the Prickley Pear Christmas Tree 2 stamp from Prickley Pear Rubber Stamps and thought I can do something with the image other than what it is. I love repeating an image over a card or layout but thought it would be cool to repeat the image in a die cut piece. The results came out real cute and will do this again.

Here is what you will need:
Prickley Pear Christmas Tree Stamp
Ink
2 Scraps of cardstock 
Pencil


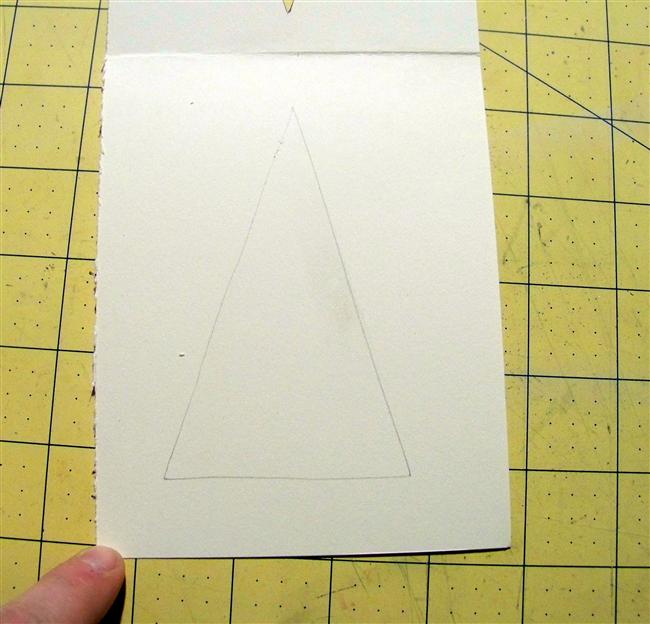
Step One:  Pencil a long triangle that looks like a tree then use a exacto knife to remove the middle of it. You want to do two of them like this.


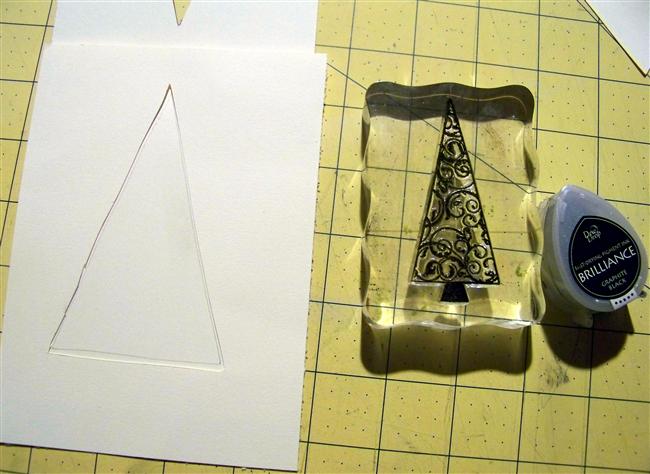
Step Two: Trace the triangle in the inside and put the piece of cardstock over it so you know where to stamp the image over.


Step Three: Hold firmly the piece of cardstock and stamp over the area 


Step Four: Repeat the process till the whole area is covered. Remove the piece of cardstock to reveal the imaged stamped a few times.

Here is my finished Card- inside and outside


Merry Christmas and Happy New Year
 

Saturday, December 22, 2012

Paper Embellishment Tutorial


I love looking at products and use them for different things other than what they really are used for. The Christmas Tree Die from Prickley Pear Rubber Stamps is an example of what I am taking about.

Its easy to make and you are able to use this in many of your projects.

Here us what you will need:
15 Christmas Tree Die pieces in patterned paper or cardstock
2- 2 inch circles in cardstock or patterned paper
Adhesive
Brush tip

Step One: Cut 15 pieces of the Christmas Tree die on patterned paper


Step Two: Use the tip of the brush and rub the paper in circular motion. You want to repeat this step to all 15 of them.


Step Three: Take one of the 2 inch circles and add adhesive to it. Then add the first 4 tress evenly to look like a cross. Then later all around till you are done.


Step Four: Glue down the other 2 inch circle in the middle of the flower.

I added the flower to my layout that I did of our Christmas photo with Santa.


Thanks for looking

Saturday, December 15, 2012

Saturday Is The New Thursday - Pinecones/Trees Theme

Welcome To Prickley Pear Design Team Themed Thursday on Saturday!  Needless to say, my week is running about 2 days behind...but the weekend is here and I'm getting back on track!  This week's theme is to use sets or images using trees or pine themes.  Enjoy!

Designer: Dawn Bennett using

Designer: Heidi Erickson using CLR005A Cardinals Set 2 & The Joy You Give To Others, Cardinal Die


Tuesday, December 11, 2012

Painting With Alcohol Ink Tutorial

Good morning PPRS friends and followers.  Today I have a special extra for all of you, a tutorial on how to paint with alcohol ink on plastic.  
Supply List:
Plastic mini take out container
Patterned paper
White Card Stock
Ribbon
small candies
BlueBirds Joy Sentiment-PPRS
Alcohol ink: Here I have used Kurecolor by Kuretake
Zig Opaque Writer
Zig Brushables
Zig 2 Way Glue
Paint Brush with synthetic bristles
Plastic lid
Alcohol
Ink pad of your choice (I have used a Memento)-Red

-Start by coloring your color choice onto the plastic lid.  I have used Kurecolor.

-Dip your synthetic paint brush in the alcohol then into the alcohol ink on the lid.
-"Paint" all sides, top and bottom of your plastic to go box.

-Decorate the front of your to go box using the Zig Opaque Writer.

-Using the Zig Brushables "Paint" the wreath.  
-Use the tip of the Memento Lady Bug ink drop to ink the J and the Y.
-Stamp the image on your white card stock flag.
-Cut a matching mat for your flag.  I used a striped pattern.

-Adhere your flag using Zig 2 way glue to your plastic to go box.
-Tie ribbon onto handle.
-Fill with candies.

Thanks for stopping by.  Hope your Holiday is bright.

Created for PPRS by Jenn Cochran


Photobucket