Hi all! Hope you are enjoying a lovely July and that you have time for some serious rubber stamping despite the Summer! I have a fun home décor project for you today using the new rubber stamp release with wild animals and beautiful sentiments: Tiger and Life and Love.
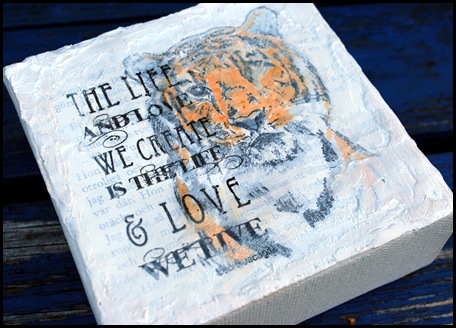
This is a really easy project, but the end result looks like a piece of art! Ready for your wall, and maybe the kid’s wall??? You need a 4 x 4 canvas, a piece of white 4x4 cardstock, some old book paper, Gesso (or white acrylic paint, but Gesso is great since it doesn’t shine), ink (I use Versa Fine Onyx Black), clear embossing powder, copics in orange and light brown and a grey, (I use only three, the coloring is not the thing here) and if you like some modeling paste. But that’s only for some finishing structure, you do fine without it!.
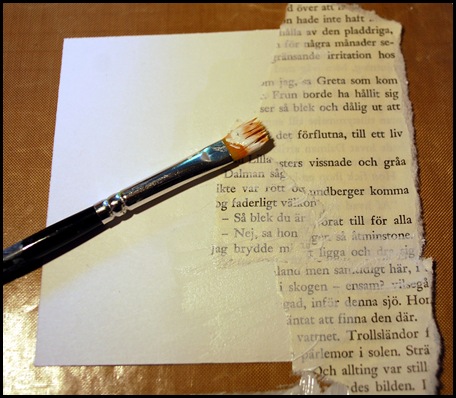
1. Put the Canvas aside, you will want to work on the white cardstock piece cause the canvas is difficult to stamp on in a later stage. Tear pieces of the book paper and adhere it to the cardstock and cover it with a thin layer of gesso. You want the book paper look to come through. When done trim the edges.
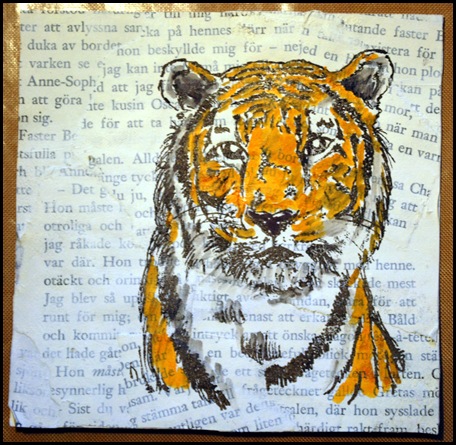
2. Stamp the image with a water resistant ink.
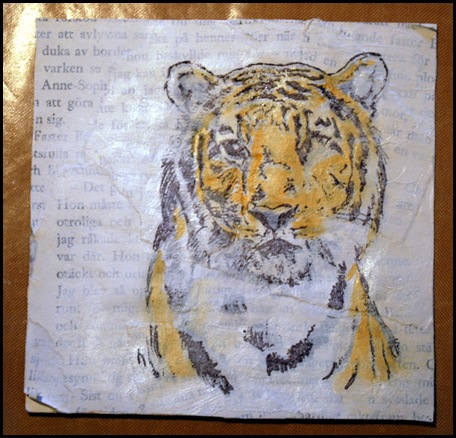
3. Color the Tiger. :)
You can do this rather quick, and it doesn’t matter if it smears some. We are going for a soft look here and will be covering the tiger with some Gesso soon. Something like this will do!
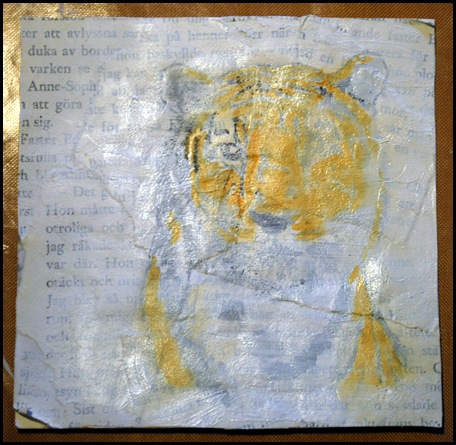
4. Cover with a thin layer of Gesso so that the tiger shape and colors are visible but softened out. The photo is shining some cause the paint wasn’t dry when I took the photo.
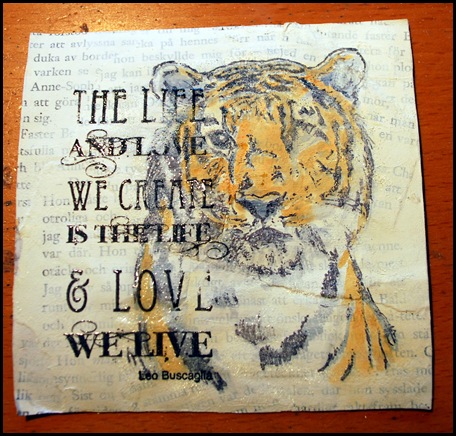
5. Next step is to stamp the tiger again, we want the outlines of the Tiger to be a little bit more visible. But not too much, so I stamped the tiger once on a piece of scrap paper and then without re inking it I stamped again on my project.
6. Time to stamp the sentiment. To make it stand out more I heat embossed it. I like the texture and the shine of heat embossing and I poured it over the whole piece and it stuck a little here and there besides on the sentiment. If you want to keep your project a little tidier, just wait until it is all dry before stamping the sentiment and pouring your powder.
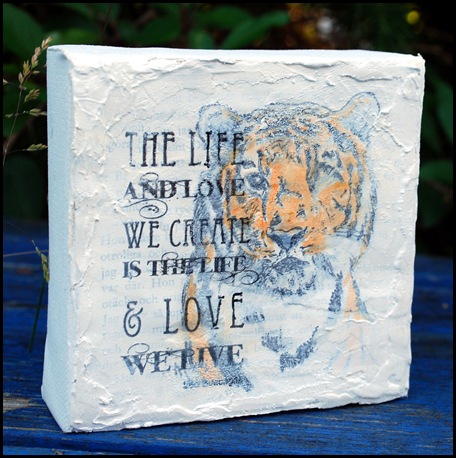
7. Adhere the project to the Canvas. I use Glossy Accent for this, cause that sticks on anything and it will never EVER let go! :) :) :)
8. Make the finish! If you have some modeling paste, ad some around the edges to get some structure. Cover it with some gesso when done. This medium is SUPER FUN and can be used to so many things. BUT you could just as well use some more gesso on the edges to frame it, to make the center pop. If you get Gesso over the sentiment while at it, simply wipe it off with a Kleenex. It’s heat embossed and gives a resistant effect.
It’s done! :) Hope you could follow me and that you liked my little project! Have a fab day!


A-M-A-Z-I-N-G Tesa! Love your project! :)
ReplyDeleteTesa, this project is just gorgeous, love the texture.
ReplyDelete