Wednesday, December 28, 2011

Sketch Challenge Reminder

There are still a few days left to play with the December sketch challenge!

It’s a super fun sketch! Check out what the Design Team did!

Card by Angelica using Snowman with Pipe and Victorian Ornament Clear Stamps Set.

Card by Kristii using Snowman Postage stamp.

You make me smile

Card by Tesa using Clearly Beautiful Build a Bird Set, Clearly Beautiful Butterflies Set and Scalloped Circle Die

Last day to enter is New Years Eve! All info and linking tool can be found in THIS post.

The Prickley Pear Team

Monday, December 26, 2011

Creating a snowflake tutorial by Melissa

Happy Monday!

Hope your Christmas was wonderful!

Melissa has a tutorial using some of the PPRS dies to share with us today. Love how the dies are such versatile tools. The other day, Lori used the same scalloped die to make flowers… :)

1.  Round up your basic supplies:

  • Prickley Pear's Scalloped Circle and Victorian Ornament 2 dies
  • two shades of glitter paper (I used silver and white)
  • adhesive tape
  • foam squares or dots
  • 1.75-in. circle punch
  • embellishments (if desired)

2.  Start by cutting out six (6) Victorian Ornaments & one (1) Scalloped Circle.  Create one (1) 1.75-inch circle using the punch.

3.  Punch out one (1) 1.75-inch circle from a piece of cardstock to use as a base.  Apply a line of adhesive across the center of the circle.

4.  Begin assembling your snowflake by attaching two of the Ornaments to the base on top of the adhesive.

5.  Add more adhesive and adhere two more Ornaments, overlapping the first two and spacing evenly on the circle.  Repeat with the remaining two Ornaments.

6.  Apply a line of adhesive to the back of the Scalloped Circle shape (I used a stronger adhesive, Sticky Strip, for this) and adhere to the center of the snowflake.

7.  Apply foam squares or dots to the back of the 1.75-inch circle shape and attach to the center of the Scalloped Circle.

You have a snowflake!

Embellish it as you'd like or leave it as it is and use it to make a card or on a scrapbook page!  You could also hang it up using silver or gold colored cord/thread.  If doing this, you would want to cut out double the number of die shapes and circles, adhering the Ornament shapes back to back before assembling the snowflake.  This will ensure that the back of the snowflake is a mirror image of the front!

Here is a card I made using the snowflake:

Thanks for stopping by!

Saturday, December 24, 2011

Merry Christmas!

We want to wish you all a Merry Christmas. Hope you have a wonderful Holiday Weekend!!!

Card by Audrey using Kitty & Bird and With Christmas GoodWill.


Card by Jenny using Victorian Ornament Clear Stamps Set.

And if you get some scrappy time during the holidays – there is a fun sketch challenge going on! It’s due New Years Eve. Is there a better way to finish this crafty year than participating? :):):) All info HERE!

Merry Christmas!

The Prickley Pear Team

Tuesday, December 20, 2011

Poinsettia Flower using Holly Leaves

For Prickley Pear Design Team By Ujjwal Goel

Step 1: Die cut 16 leaves using the Prickley Pear Holly Leaves Die

clip_image002

Step 2: Stamp and white heat emboss different leaves on the die cuts using the Holly Leaves and Berries Stamp Set

clip_image004

Step 3: Using Walnut Stain Distress ink and ink blending tool/Sponge, ink the edges of all the embossed leaves to give them more definition and a rustic look.

clip_image006

Step 4: Its now time to arrange the leaves into a flower. Use a 1” circle for the base and start arranging the leaves. We will use 8 leaves for the first layer and the rest 8 leaves for the second layer of flower to build dimension. (the picture doesn’t show a circle for the base, but this is the basic idea of arrangement)

clip_image008

Step 5: Once the first layer is glued to the base circle, using the remaining 8 leaves and dimensional adhesive/foam dots to build the second layer

clip_image010

clip_image012

Step 6: To finish off the flower, add a circle and a big rhinestone to the center. The flower is now ready to be used as an embellishment on your next holiday project.

clip_image014

Here is the card I made using the flower.

image

Enjoy!


Saturday, December 17, 2011

Lori’s Rose Tutorial

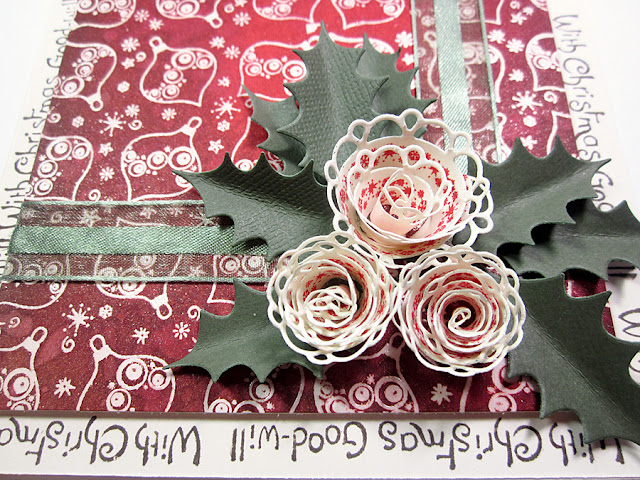
Hi folks! Lori has made the cutest roses out of the Prickley Pear’s Scalloped Circle Die and here is a tutorial how to make these yourself. But first the beautiful card!

Products used: Holly and Berries Die, Circles Clear Stamps Set Winter, With Christmas GoodWill, Ornaments ATC and Scallop Circle Die

Here are the how to:s

Supplies Needed: Scalloped Circle Die, Circles Clear Stamps Set Winter, Quilling Tool, Scissors, Ink, and Paper


Step One: Cut Scalloped Circle Die


Step Two: Stamp both sides of the die with matching stamp set.


Step Three: Cut through the circle and cut center circle out leaving the outer rim only


Step Four: Curl around quilling tool tightly and then remove…let it open up some and bend back some of the filigree edges back around the outside for a finished rose.


Ready to use!

Happy Scrapping!


Pssssst: A new sketch challenge is up and running! All info HERE!

Thursday, December 15, 2011

December Sketch Challenge!!!

Hi all and welcome to the last sketch challenge for this year! Perhaps a perfect challenge for those lazy days between Christmas and New Years Eve?

Nicole has made us a super fun sketch to use:


And here are the cards from the Design Team!


Now we'd love to see your take on the sketch. Here are the how to:s

Everybody is welcome to participate, no PPRS products needed. Simply make your card based on the sketch and link it up using Mr Linky below by December 31th. Easy Peasy.

One winner will be drawn randomly and will receive a $15 gift certificate at the Prickley Pear Web Shop!

Thank you for playing with us!
The Prickley Pear Team

Mister Linky's Magical Widgets -- Thumb-Linky widget will appear right here!
This preview will disappear when the widget is displayed on your site.
For best results, use HTML mode to edit this section of the post.

Monday, December 12, 2011

Design Team Monday

Hello! Hope you had a wonderful weekend and is up for a new fresh week! It will be filled with lots of Christmas preparations for many of us… And it’s time to get the Christmas cards out!

Here is some Seasonal inspiration from the Design Team

Card by Michelle using Ornaments 2 Clear Stamps Set and Gift of the Season.


Card by Kristii using Ellie and Gift of the Season


Card by Melissa using Birdcage Winter 2 Clear Stamps Set.


Card by Jenny using Retro Christmas Cat.


Card by Audrey using Holly and Berries Clear Stamps Set, Holly and Berries Die, Gift of the Season and Plump Cardinal on Berry Branch.


Card by Angelica using Birdcage Winter 2 Clear Stamps Set and Birdcage Die.


Snökula 1

Snow globe by Tesa using Pumpkin and Snowman Clear Stamps Set, Pumpkin and Snowman Die and Evergreen with Star.


Thank you for stopping by!!!

The Prickley Pear Team

Sunday, December 11, 2011

Storage Ideas

Hi folks! We have two DIY (do it yourself) storage ideas to share today. One Prickley Pear Clear Stamps and Dies storage by Tesa and one Ink blending tool turorial and storage by Cheryl.


Stamp storage by Tesa

The Prickley Pear Clear stamps come with a great sturdy acetate cover to where they cling perfectly (for years and years, no problems with clear stamps on the loose!). A good thing is that the acetate cover is in one piece, and folded over the stamps. I’ve been looking for a way to keep these stamps together with the coordinated dies in a more organized way (than my usual chaos) and decided to go for a home made file filled with plastic pockets.

Pärm 1

I started with laminating 10 white cardstock big enough to hold the stamps and fit in the plastic pockets. The plastic pockets are around 5 1/2 x 8 1/4 (European standard A5). The stamps are adhered on the front of the laminated cardstock and I’ve made a pocket to hold the die and diecut template on the back. Then I filled ten pockets with stamps and tied it all together with twine through the plastic pocket holes. I used some spacers made of pizza boxes.

I used the finished plastic pocket book to measure out the size of my file. I cut three pieces of cardboard out of pizza boxes for the cover and laid them out on the table with some spacing between the pieces.

DSC_0014

Then you just have to adhere them with some tape. Remember to keep the spacing between the pieces, it’s there so that you will be able to close the file!!!  I use electrical tape cause it’s a bit elastic and will stay on forever.

Pärm 4

Now it’s just to cover it all with some paper and decorate it the way one wants to.

When done with that, make four holes in spine of the file. Measure it to fit the holes of the plastic pockets. Use twine and a needle to first fasten the twine through the pile of plastic pockets and then go through the holes in the spine and tie a know and they will stay in place.

Pärm 6-1

Pärm 2

And here is the inside with the stamps and die holder. This way I always have the die I want at hand and it also keeps my die cut template so that I don’t have to make a new one every time.

pärm 5

(and sorry about the messy tape, but it’s a sign of love and use…)


Inking tool storage by Cheryl

I've seen several tutorials on making ink blending blocks rather than buying those expensive applicators with the handles (here is a good video tutorial). It sounded like a great idea to me, so I enlisted my husband's help and he set about to cut me 36 blocks (one for each Distress Ink color--I don't usually use other inks with sponge applicators). As he was cutting the blocks, I started thinking about how I could label them and also how I could label and store the sponge daubers so I could have one dedicated to each color also. Then it hit me, why not store the daubers inside the blocks! I wasn't sure it would work, but my husband made several test blocks and came up with one that works perfectly. So when I am in need of an ink applicator, whether it's a foam pad or a dauber, they are both conveniently in one place. I can use the block with or without removing the dauber. Without thinking about it, I found that I was placing my finger in the dauber while I was using the block--kind of like a giant dauber. :) 

Ink 1

Here's what you need to make your own set:
Two (2) - 2" x 2" x 36" wooden ballisters ($0.89 each at Home Depot)
3/4" Wood Boring Drill Bit (approx. $4.00 at Ace Hardware)
1" wide Hook and Loop Tape--you'll need about 72" (if you use 3/4" wide tape, you'll need about 90")
Return Address Labels (or some other kind of label)
Label maker with clear tape and black letters
Blending foam applicators
Sponge Daubers
To make the blocks, begin by marking 1-7/8" for each block on the wood. You can get 19 blocks per ballister. Do NOT cut the blocks yet!

Clamp the wood strip securely and drill a hole in the center of each 1-7/8" section. You will need to drill almost all the way through so that the dauber will fit in far enough to allow the lid to close on the box.

Ink 8

Don't worry when the starter point on the drill bit protrudes out of the bottom of the wood. It has to in order for the hole to be deep enough. This hole will be covered with hook and loop tape. After all the holes are drilled, use a saw and cut each block on the marked lines. After cutting the blocks, sand them where necessary.

For the hook & loop tape, you only need the hook part (the sticky, rough part). For now, I just have the hook tape adhered to the block with it's adhesive backing. Eventually, I may either glue or staple it down because I noticed that when I pulled the applicators off the tape, it sometimes pulled the tape off, too. But, since I won't have to be constantly switching out the foam applicators now, once I get one attached to each block, they can stay there until they are worn out. I love the convenience!

Ink 9

Ink 7

I found this box at Joann. I think it was called an embellishment box, and it was on sale for $6. The box is the perfect size for all 36 blocks, and even with the daubers inside the blocks, it closes just fine.

Ink 6

For a more detailed tutorial and more photos – go check out this post over at Cheryl’s blog!


Thanks for stopping by today!

Cheryl and Tesa