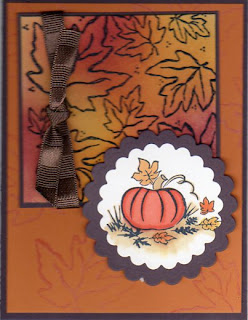
 This technique creates a richly colored background that brings out the detail of the background stamp.
Materials:
Black or Dark Pigment Ink or VersaMark
Black Embossing Powder
Dye Inks in Complementary Colors
Sponges or Daubers
Background Stamps
First, Stamp and emboss the background Image on a light, Ultra Smooth Cardstock.
 Next, starting with the lightest color sponge various spots on the background. Continue using the next to lightest color etc. (Yellow, Orange, Red) Once the whole background is colored, go back over each spot again to bring out the richness of the colors. My card above uses the Maple Leaf Background Stamp, Single Maple Leaf and Pumpkin.
Using a smaller background stamp (Swirls), I could create a fun ATC using Blue, Purple and Pink Inks. Other stamps used were the Dreams Take Flight and Faces half sheet.
Suggestion of the Week: Dig around for those old background stamps and some sponges. The results may surprise you. If I did these again, I would wear rubber gloves while swirling my colors.(I'm a messy Stamper!)


 I stamped on a clear piece of plastic. The ghosts were cut out and shrunk using my heat gun. (If you haven't done this before, the piece will look like it's curling up but will unfold as it continues to be heated.) Note the comparison from it's original size.
 To brighten up the background on my
